Sunday, June 26, 2011

A Tale of Two Thermometers... 60min IPA Brewday

It's a glorious day to brew!

I love Dogfish Head's 60minute IPA. It's probably my favorite commercial beer. For those that don't know, DFH invented this technique of continuous hopping... Typically hops are added at timed intervals, bittering hops at the beginning of the boil (60 minutes left) flavor hops in the middle (30 minutes) and aroma hops at the end (5-ish minutes) and you end up with bitterness, flavor, and aroma. With continuous hopping, you add small amounts continuously (every minute or so) throughout the boil. The theory is, you get a nice spectrum of everything the hops have to offer... in my head it's like a hop rainbow... like hop flavored skittles?? but anyway... as far as I know DFH is the only brewery that does this. They have 60, 90, and 120 minute IPAs. My fav is the 60.

This is a beer I like to brew a lot, but I change it up a little bit to my taste. I started with a great DFH 60min clone recipe but I changed up the hops bc I really like the citrus hop flavor and aroma. I nailed it once... but that was before I started keeping detailed notes and a recipe book... ugh. Today I just made a small change. I switched out the Simcoe (very distinct flavor) for Centennial (citrusy flavor/aroma).

I have been wondering about the accuracy of my cheap cooking thermometer that I use to check mash temps.  I was suspect that it read a few degrees high. So when I think I'm mashing at 152, I was probably really in the high 140's. Sounds trivial, but a few degrees can change the attenuation (how much of the sugars actually digested by the yeast) and this affects body of the final beer. So I figured I would compare with the thermocouple on my electrical meter (what I used to use).

I set up both, side by side for the mash. The cooking thermometer was reading 5 degrees higher... ok... good to know. 

So I left it there with my electrical meter showing 155 (which I trusted) and the cooking thermometer reading 159 (kinda disregarding), so I rolled with it. 

I come back 30 minutes later, the cooking therm still says 159, but the elec meter is now saying 163... wtf??? 

I admit, I panicked... I got a quart and a half of cold tap water, dumped it in, and stirred... Now, cooking therm 149, elec meter 146... WTF??? 

So... I added a quart of boiling water and stirred... cooking therm 152, elec meter 149... ugh. Fiine... I'll just leave it...

What did I learn? Two things... I should trust the laws of physics (they are for realz)... and I need a decent thermometer... Well... it is what it is... this beer will probs end up super dry and maybe lacking body, but I can tell myself that its "crisp and refreshing"...

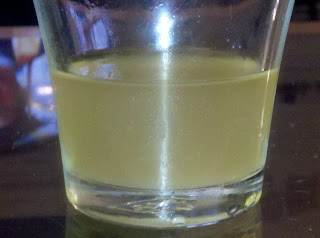
Just a cool pic... here you can see the extreme color difference between the first runnings (in the pot) and the first sparge (in the blue measuring cup) as I vorlauf (recirculate to keep the grain material out of the boil)

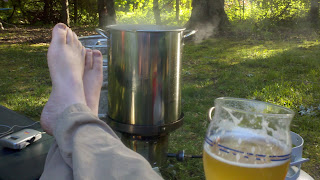
The rest of the brewday was pretty uneventful... I did my 60minute boil, which seems so quick since I've been doing 90's so much lately... I did the continuous hopping thing, couldn't really multitask or walk away from it, so I took advantage and  grabbed a little zen... 


After the boil, I started the chiller and started the clean up. I came back a little while later and noticed this super cool formation of the break material as it settled... looked like a column in the middle of the chiller...

Tried to show the break material that had settled, then stirred it up... then really stirred it up to get an "accurate" (total sarcasm) temp reading on the chilling...

Took my gravity reading 1.065 (corrected for temp), my volume ended up a little high at 5.75 gallons instead of 5.5 so that puts efficiency at 78%? totally respectable...

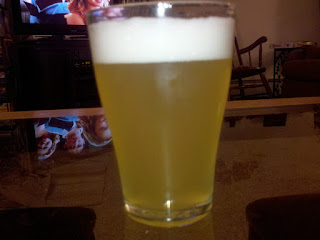
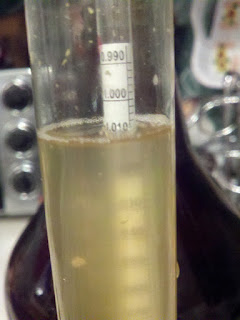
Here's my gravity sample... you can see the break material settled out. This gives a good idea of the color (and hopefully the clarity?) of the finished product...

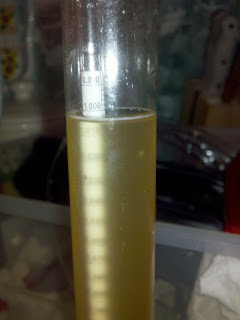
Also... I took another sample of the Saison... to check clarity and see how the flavor is coming along... I was surprised to see the gravity has dropped to 1.000... so redic... the aroma is supergreat... I'll be kegging this this week bc I can't wait to see what it tastes like carbed up...

That's it for today... going to see the fireworks tonight, then back to work tomorrow... but oh! I'm going to NYC on Tuesday! My first time! I've lived in New England for 30 years and I've never been, lame amirite??Psyched!! Later...


Saturday, June 25, 2011

Keggle (not kegel) Workout...

Worked my second job, drivin' the Zamboni (the novelty wears off, trust...) at the local rink. Things are pretty slow this time of year, so I spent 80% of the day on the social networks and the other 20% staring out the window thinking of brewing.

I fully planned on epic brewday after getting out of work early in the afternoon. Firstly, was going to work on keggle, then on to 60minute IPA brewday. That was the plan anyway... What really happened: Tween birthday party at public skate and the stayed until the bitter end, then longer, then I got bitter, then I started to hint that it was time to go... they weren't really getting it... total obliv... Then when I finally got out, a few errands to get stuff together for keggle (not kegel (lolz)) project. By the time I got home the afternoon was half gone. But... I started the keggle (not kegel (getting old? sry, too bad, makes me lol every time...)) project. 

Old, dented, dirty, beat ass keg about to get a new lease on life...

Everything I needed... Left to Right... Angle grinder with cutting and grinding wheels. Drill. Cutting fluid. Kick-ass sized (3/32) drill bits for pilot holes. Step bits. Hammer. Nail. String. Safety googles. Extra drill battery, Sharpie. And of course, most important, beer.

 Listen up! This part's super important! You gotta (GOTTA) release the pressure before compromising the structure of the keg. The super easy way is to lay the keg on it's side (unless you want a face full of really old, really gross beer) and gently tap a nail between the ball bearing and the plastic seat, preventing it from sealing. When rank old beer smell stops blowing out, you're all set to proceed.

Now the super high tech, precision method of drawing a circle to cut the top off the keg. String tied around bung (snicker) and around sharpie. I made the circle as big as I could without the grinder hitting the rim/handles. Just to let you know, there is another method. Building a jig to hold the grinder, and cut a perfect circle as you spin it around the bung (snicker). I'm not going to say that's not how I roll, but this keg is so beat, I said screw it and decided to freehand...


The trick with the grinder, is not to try and plunge in and do the whole cut in one pass. It won't work... well... it will, but it will look like dogcrap. Full disclosure, totally used safety googles, you would be a total moron to use a grinder without. Red hot sparks fly directly into your eyeballs. Srsly. Wear 'em! I did a light pass, following the sharpie line just trying to score it. Then I kept going around making the groove deeper until it started to break through. Then I got srs and dug in.

About halfway through, I totally took a beer break, as seen here. Here, I have cut through about halfway around. It probably took my 45 minutes total running the grinder. My neighbors were full annoyed I assume, they slammed their back door shut as soon as I turned on the grinder. I'll offer a pint and a sorry next time I see them, who could stay mad at that?

 Success! Top is off. The diptube keeps the whole thing from falling in, had total duh moment bc I was expecting the top to fall in and it didn't... If you look close, you can see what I can only assume is delicious, stale, bacteria filled, 20(?) year old beer...

 So... after chugging the beer (total joking) and ditching the top, you can see the pretty inside of my new brew kettle! I used a grinding wheel to clean up the edges. Not bad for freehand?

Now to drill the holes... I am planning on having two couplings welded near the bottom. One will be for a drain valve with a pick-up tub that will reach to the very bottom of the curved bottom... (...bottom... also, bottom.) The other will be for a combination thermometer and sightglass. I may just plug this one for now, but I want to be able to add them later

This stuff... is critical. Well, is doesn't have to be that particular stuff... but you have to use cutting fluid. Stainless is a PITA... use it. use it often. I drilled a pilot hole with a 3/32 bit, I find this to be the perfect size for pilot holes in any metal work. Tip for drilling stainless... go slow, push hard. It's more like cutting than drilling. If you go fast, you are going to smoke the cutting fluid and dull the bit. The pilot hole goes quick, then I moved up to the step bits. I cheaped out and picked up a new set of the Harbor Freight specials... They are full garbage (I knew they would be) but they got the job done. If I were going to be doing anymore than two holes I would def get the quality step bits.

 After all the grinding, the drilling really kicked my ass. Total workout. After finishing off the first hole, I said, "do I really need a sightglass?" But I toughed it out and drilled the second hole.

So... two perfectly uneven holes... What has two thumbs and doesn't care (not even a little bit)? 

This guy...

After cleaning up, the next step is welding the 1/2 inch stainless couplings into the holes. I don't weld (wish I did) But I know a guy who knows a guy... but that will have to wait for another weekend. Besides, I'm total wiped. Sweaty, greasy, probs smelly, covered in grinding dust and stainless shavings... beer, shower, couch, blog... in that order. Brewday postponed until tomorrow... too tired to even go to the town fireworks tonight. Oh hey! Netflix, what's up?? Later.

Sunday, June 19, 2011

Father's Day...

Happy Father's Day...

So I'm sure you noticed the new look for Hop River Ales? Too Myspace circa 2004?? It's in progress, expect some tweaks...

Not much going on brewing-wise this weekend. Was a busy weekend, worked second job Saturday morning, as usual, did much needed brakes front and back on the wife's car. Then Father's Day, nice family breakfast, got a few hours break from the kids (does that sound full terrible?) thanks to the in-laws, then full family get together for all the fathers... on the go go go (expect anything else?)...

Feeling crunched for time... actually a little stressed about getting nothing done on the brewing front. I have the ten gallon upgrade hanging over my head. No actual deadline on that, just excited to get it done... Need to get brewing, two batches due to be drinkable for vacation...  I have become the "official beverage sponsor" of the annual Casco Days Annual Casco Wiffle Ball Tournament... Really this is just the extended family getting together and choosing teams based on Red Sox / Yankees loyalties... just for fun, beer drinking, trash talking, slow pitching to the kids, do we keep score?? who cares? But anyway... I promised homebrew, and I have a little over a month to get two brews in. Also, was planning on kegging one batch and bottling the other. But, time constraints, idk if I can bottle condition in time. So... I might go big and keg both (I'm gonna need a lot of ice!) Kinda freaking out a little... I might need to do a double brew day... also, I have the Saison sitting in one of my two fermentors. So that would mean kegging or racking to secondary (transferring to a 5 gallon glass carboy (carboy is a big glass jug) to get the beer off the yeast cake) the Saison just to free up a fermentor. Or... I could buy another bucket. Also, if I'm bringing two kegs, I have to put together another picnic tap (I only have one!)

Enough stressing... on to the subject at hand. I got two nice beers for Father's Day. Fully enjoyed both, so I thought I could try and do a write up. Again, I am terrible at tasting. My palate is far from trained. I like everything and I am terrible at describing anything sensory. But here it is anyway.

 Dog Fish Head Red & White

In case you haven't figured it out, I'm kind of a DFH fanboy. I have tried most of their standard six and four pack releases and liked most (120minute is too much for me and I was not a fan of Festina Peche (like drinking regurgitated peach beer, so acidic)) But, I have been wanting to explore the limited releases (champagne bottle packaging) I love Midas Touch and, from the description, Red & White sounded similar. I drank this with lunch, outside in the shade on a glorious day. 

DFH description from label: Ale brewed with coriander & orange peel with Pinot noir juice added with 11% aged in Pinot noir barrels and 89% aged on oak barrel staves.

What I noticed...

Appearance: coppery red with a rosey tint, very unique color. poured with a thick, rich head that was decidedly pink in color. had lasting carbonation and good head retention.

Nose: malty, distinctly like a red ale, no detectable hop aroma. light, whispy, fruity, grape.

Body: thick mouthfeel without being syrupy, no high alcohol "hotness" this is a 10% abv beer but doesn't taste it...

Taste: malty red ale flavor, delicate grape, not overly sweet, slight oakiness but not overpowering (hate that in wines) I did not pick up the orange peel or coriander, but that's probs me...

Finish: very, very clean, almost no aftertaste at all. I thought it finished more like a wine than a beer.

Overall: very reminiscent of Midas Touch, but maltier, more body. I would put both in the same style, if there was a traditional style that they fit into... very drinkable and at 10%, the 26oz bottle is about as much as I can handle in one sitting.


Stone Ruination IPA

This beer is a total badass. This ain't your father's IPA...

An excerpt of the description from the label, 
"Stone Ruination IPA. So called because of the immediate ruinous effect on your palate. The moment after the first swallow, all other food and drink items suddenly become substantially more bland than they were just seconds before. By the time you develop a taste for this IPA, you may find that you are permanently  ruined from being able to enjoy lesser brews. Good. We freely admit to doing this. On purpose even! People are sometimes crazy enough to thank us for this assault. To which we reply 'You're welcome.'"

Tongue in cheek? maybe... but when you produce a 100+ IBU (International Bittering Units, 100 IBU is the theoretical limit that the human tongue can detect) for regular distribution, you earn the right to swagger a little...

Appearance: typical for an IPA, pale in color, white head, slight haze

Nose: Hops! what can I say, if you cram that much hops in a beer, there isn't that much else to smell especially when fresh. I do detect a little bit of biscuity malt rising through, but barely.

Body: on the thick side but not the thickest Imperial IPA I have had.

Taste: Hops! strongly bitter. you gotta really like hops to enjoy this. to equate to chili peppers, it isn't all heat (bitter) though, there is definite flavor in the hop profile. I wish I could discern the the type of hops, slightly citrusy, also piney?

Finish: dry, lasting bitterness.. I need a glass of water... not really a thirst quencher (why do I keep using that??? ugh)

Overall: badass.

Next week should be busy, I hope to be brewing and blogging a lot... Later.

Monday, June 13, 2011

Bloggin' Drinkin' and Plannin'

Total glamour shot of  Witbier 2.0... sexy?

Quick update on Saison... aquarium heater gave up, but I think that's ok. Fermentation finished before temps dropped back to ambient (65 degrees)... I tested again tonight and the gravity was at 1.004 same as Saturday, so it's done. I was raising temp during fermentation to stress the yeast into producing the esters (spicy, peppery, clove flavors) characteristic for the style. Since fermentation is done, I don't think the temp matters as much anymore. So I will just leave it alone for the duration. If I wanted to rush things, I could totally keg this now and stick it in the fridge and carbonate. But... I don't, not this one. I'm going to let it sit in the fermentor (remember I subscribe to the long primary/no secondary philosophy) for another 2 weeks before kegging.

Meanwhile... feeling the itch to brew. IknowIknow, it's only been a week! My next two batches will be specifically intended for summer vacation. Every year we go up to the family cottage in Maine. Again, big family, also friendly neighbors (also family) so I was planning on bringing 2 batches (better to have too much amirite?) I am thinking a bold IPA and a light refreshing session beer... although I have had requests for my summer cider (totally awesome to have requests btw)

For the IPA, I am think I want to do a clone of one of my favorite (badass) Imperial IPAs. One of the mods of homebrewtalk.com posted a recipe for a clone of Stone's Ruination. This is the same person that put up a recipe for DFH 60minute clone which I have brewed a few times and since adapted to make it my own. I won't be bringing my kegerator to Maine... no room.  2 adults + 2 small children x 10 days = ugh, maybe we should rent a Uhaul. And.. I haven't built a jockey box yet. A jockey box is a cooler full of ice with a coiled up tube that you run your beer through before reaching the tap. This way you don't have to keep the keg cold, the beer cools as it runs through the cooler. Eventually I want to build one, but that's low on the list. So... I think I will be... (dramatic pause) bottling this batch. Sucks for me, but at least I can show you how it goes... I will be bottling in bomber (22 oz) and Grolsch flip tops (16 oz) so, looking on the bright side, it won't be as bad as a full batch of 12 oz bottles.

For the session beer, I am thinking Witbier 2.1 I know I know, witbier again?? But my wife's uncle, who is nice enough to share his vacation at the cottage with us, is a big Blue Moon fan. So I want to bring something he will like. I am going to keg this one. I think I can manage to keep one keg cold for the week, but def not two.

So... family, lake, water skiing, swimming, ice cream shop across the street, also, lots and lots of beer... sounds like a great vacation right? Totally.

Also, I keep saying it, but I think I am going to cut and drill the keggle this weekend. I need to get some fittings so I am going to try and get to the supply house during lunch sometime this week. Welding will likely have to wait for another week. So I guess that's it for tonight... Later

Friday, June 10, 2011

Zomg Saison...

Everything about this Saison batch has me fully psyched. I know this seems like a weird thing to be excited about, but this isn't just another batch for me. Idk why this is so exciting... something new? pushing the limits? but it is... in a total nerdy way. Like, the first time I found the hourly weather forecast graph and the full resolution radar loop of the nation on NOAA's website... I mean... pfft , weather graphs? radar? that's total snoozefest, amirite? (convincing?? at all?? ugh, didn't think so...)

Anyway... beer? don't mind if I do... drinking my Witbier 2.0 tonight.

Please hold comments regarding what redic movie is on tv... not my choice, hence the fact that I'm blogging.

Color is great, having a really hard time taking a pic that does it justice. Need to take pic in a full sunny window maybe, I am not a photog nerd... also all pics are taken with my phone, so... it is what it is?

Flavor is much better than the previous inefficient batch. Softer, more balanced, not sure if this is because of the better extraction or bc I let it sit a week longer in primary before kegging... Better mouthfeel and body despite the fact that it fermented down to 1.008, this is probs because of the better extraction? Really happy with carbonation levels, did the same thing as I described in the last batch. Force carb at 30psi and then reduce to a high serving pressure. Good head retention, which is something I have always been underwhelmed with in previous batches. I give it a solid B... I have a few things in mind to tweak the recipe for next time. Also, I now realize that the tablespoon of flour I forgot in the last two batches is completely unnecessary. The haze that is expected for the style is persistent and I don't think it's something I have to worry about...

On to the Saison... I have been fully babying the fermentation temps. I totally intended to graph the temps, but I am not classically trained in MS Excel (hate it) so I will just give super boring narrative... 

I cooled to 75 and pitched my yeast. I set up my swamp cooler and aquarium heater, but it failed.. at first. temp fell to 68 for 12 hours. Then I finally got it working, and got the temp back up to 75 and held it there for 12 more hours. After the first 24 I raised temp as high as the aquarium heater would go. With my thermocouple taped to the side of the bucket and a blanket over the whole thing, I got up to 83 and held for 48 hours. after that fermentation slowed down and temp has held at 80 since.

I opened the bucket tonight to take a gravity sample.
Krausen has fallen, though the ring around the bucket indicates that it was NBD to begin with...

What does that say??? 1.002??? in 6 days??? mmhmm... also, holy crap!

1.061 to 1.004 (corrected for temp) clocks in at 7.5% abv... I can live with that. Also, not 100% sure that it's even completely done. I'll test again in a couple days to find out.

Put gravity sample in freezer for 20 minutes to chill for tasting.

Will reserve full comment on sample for when it is done, kegged and carbed... but very excited! I can get the hints of spice (from the yeast) and malt characters, also, for being this dry, holy body!! I don't think I could be more excited for this beer...

Thinking of next brew, though it might be a few weeks before I brew again (life is busy) but thinking IPA probs an easy traditional style... no pils (90min boil) or 60 minute continuous hopping (love it, but such a PITA) Also, planning to start the keggle. So that's what's coming up... but I guess that's it for tonight, Later...

Sunday, June 5, 2011

This is why brewing does not save you money...

Just sitting around thinking about projects... restless... figured I could think out loud on here? That's totally what a blog is for, amirite?

So to recap my projects to date...

I started with a beginner extract kit. Due to the offensive odors and sensitive nose of my wife, I had to quickly move all  brewing activity outside. While not really a project, my first upgrade was a turkey fryer. Got a crazy deal at Cabella's bargain cave. $200 stainless turkey fryer marked $125 and I talked them down to $60. So I was soon doing full boils outside.

Boiling a full 5 gallon batch creates a small problem... it takes f-o-r-e-v-e-r to cool 5 gallons of boiling wort to 70 degrees so you can add the yeast. So I built my ugly junk wort chiller, which was easy, I wrapped 25 feet of copper pipe around a bucket to make a spiral and attached a washing machine hose...

From there, it was a small jump to doing All Grain. All I needed was a mash tun. I showed you how I made my 10 gallon tun. The 5 gallon was exactly the same, just... smaller.

Then I got sick of bottling. When I say "got sick of bottling", I mean I dreaded brewday bc all I could think of was the PITA to come when the batch was ready for bottling. That is when I built my kegerator. Bought the fridge on sale at Home Depot, bought the tower, tank, kegs, and fittings from my Local Home Brew Store. Drilled holes in a brand new fridge (so scary!) but so glad I did it... If I hadn't started kegging I don't think I would still be brewing.

I am in the middle of upgrading to a 10 gallon  brewery. I finished the 10 gallon cooler mash tun, as you saw... and that brings us up to now.

So what's next?
This.

This old, tired, beat ass keg will soon be my main brew kettle. Sidenote... kettles made from kegs are called  "keggles" not to be confused with kegels (totally different thing, trust) although Google gets confused... 15.5 gallon (1/2 barrel) capacity will be enough for 10 gallon batches. I'll need to cut open the top to turn it into a pot. Also, 10 gallons of liquid weighs more than 80 lbs... so picking up to pour after boiling isn't an option. So... I'll need to drill a hole near the bottom and have a valve installed so I can drain it into the fermentor. Also, to make things easier, while I am drilling holes and having things welded, I am going to put in another tap to add a combo thermometer and sight glass (easy way to see how much wort/water in pot) All this thing will need is a total dyed ostrich feather and it will be 100% pimp... Also, unrelated, I can totally hear the old beer inside sloshing around... dare me? (I <3 danger games...shh!)

So... after keggle I will fully be able to do 10 gallon batches. Well... almost... I will need a couple more bucket fermentors, maybs a few more kegs, oh and my little 25' wort chiller is going to be pretty weak... so I'll need to build a bigger chiller. I'm thinking counterflow... picture a garden hose with a copper tube inside... hot wort flows through copper tube in one direction, cold water flows through hose around copper tube in opposite direction. now picture all coiled up to save space. Then I'll be all set...

Well... then I'll probably be looking to build a shed to start holding all this stuff. Oh, maybe I need a fermentation chamber to control temps... Also, a bigger kegerator... Also... A brewstand and automate the whole thing... Where does it end? Short answer... it doesn't.

Anyways... it's time for Game of Thrones (best show) Later...


French Saison brewday... or, Le jour le plus long jamais de brassage.

Exhausted. Totally spent the past 8(?) hours brewing... Usually, my AG brew day takes about 5-6 hours with clean up. Not sure what took so much longer this time, probably a bunch of little things I guess. Also, I took my time and tried to find my zen (eventually I did)... Probs shouldn't even be writing this up tonight but I want to get it out while the details are still in my head.

So... French Saison! I have been waiting to brew this beer for six months. The actual brewday was typical, pretty much the standard routine. But now that the brewday is done, I get to mess around with fermentation temps. While I have controlled ferm temps before, it was always to keep them normal despite environmental influence. This time, I am going to be pushing temps way beyond normal.

Quick summary of the recipe...

75% Pilsner, seems like all my beers these days use pils as the base malt... of course this also means a 90 minute boil...

25% Rye malt, my first time using rye. I had heard a lot about rye being worse than wheat for sticking a sparge. So I did my usual 1/2 pound of rice hulls just like I do for wheat and I had no problems.

1/2 pound of belgian candy sugar... added late in the boil, this serves two purposes. First, it adds a bunch of fermentable sugar so it will boost the ABV. Also, it will help the yeast really dry out the beer and attenuate really, really low.

For hops, I just did a single bittering addition and it wasn't anything drastic. This really just balances out the beer. Hops isn't the focus of this style.

Just to FF through the mash, preheated mash tun, heated strike water, doughed in (mix in grains to hot water), hit my mash temp (152) and mashed for an hour. I mashed out, double batch sparge... All total routine.

I'm kinda struggling for words tonight... so I hope you like pictures!

I was really nervous draining my second sparge. Wasn't 100% confident on my calculated volumes and was worried I would overflow the kettle. Last time I got another pot and ended up not needing to. This time, I played the full danger game and let it go... right to the top! Being this full, I really had to baby the boil so I wouldn't go over.

 While I was heating up to boil, I cleaned out the mash tun. Here's a dirty tun and a bag full of spent grains. I know what you're thinking... "What can you do with those?" well, you can compost them, some people make dog treats with them, spread them out to attract deer... I can def tell you what not to do with them. Do not put the bag in the trashcan in the shed and forget about them for the hottest week of the summer. Holy. Crap. Worst smell ever.


Oh, what's this? a video? Sure! A full rolling boil, I could watch this for hours (oh wait... I totally do) Also... do you hear that?? Me neither. So quiet, totally chill...Also also, see all the stuff rolling around in there? That is the break material... coagulated proteins. A good hot break helps those proteins clump up and they will then settle out in the fermentor later. This will help a lot to get really clear beer... I have another pic later that will show you what I mean.

And here is my zen... Sitting in the quiet on a beautiful day, drinking beer I made while making more beer... Greatest hobby? I think so...

 Idk if I ever showed what the hops look like...? They are ground up and extruded into pellets for better shelf life (I think) Looks like rabbit feed... Ask me about the time my three year old boy found a hop pellet I dropped while brewing. I'll give you a hint, he's braver than me and I am kind of a hop head... Also, I would bet money that he never picks one up again...

On the right is the Belgian candy sugar, basically rock candy. On the left is whirlfloc... one tablet added to the boil with twenty minutes helps to get clearer beer(er).

My gravity sample post boil... See how clear!?! If the pic was zoomed out a little more, you would see all that break material in the bottom of the sample tube. It settles out fast once it has a chance to sit still. Also, my gravity ended up at 1.061 (corrected for temp) that works out to 78% efficiency! so... that's awesome especially after the last two lower efficiency batches.

 My super mad scientist setup for controlling the temps... Let's see... Fermentor in rubbermaid bin full of water. Aquarium heater in water. My electrical meter with thermocouple (really accurate thermometer) taped to the side of the fermentor to monitor temps. Also, starting out with a blowoff tube just in case..

So, that sums up brewday... I'll def document the temp control (should I do total nerdy graph?) because that is the part I am really excited about...

Also, kegged the Wibier 2.0 tonight. This one sat for 2 weeks which isn't a really long time for a beer, but twice as long as the last one. Tasted the sample and I am much happier with the flavor on this one (though I like the inefficient one too) am I full rambling here? I think probably... but the mouthfeel was more substantial and it has a smoother, rounder flavor than the Inefficient Witbier.

 A look in the fermentor, you can see the orange peel and coriander seeds floating around...

 Nice color, lighter than the last one. But check out that gravity! 1.008! Idk why it went down that low... I think because I mashed on the low side and then my mash temps fell 5 degrees over the hour (which I am finding is the norm doing 5 gallon batches in a 10 gallon mash tun)

Anyway... the other goal tonight was to kill the keg of Inefficient Wit. I knew it was really light and I needed the space in the kegerator to carb the Wit 2.0... Mission accomplished.

 Also this. Total teaser for my next project... 
Remember all that business about upgrading to ten gallon batches? Sure you do... Later.