So I'm 2/3 of the way through the first keg of the California Common posted here. And I figured I would update on how it came out... something I rarely do. This may be the best "to style" beer I have made... Crystal clear, I attribute to doing my first protein rest which I will be utilizing more in the future due to these results. Hop profile is great, though this is only a single hop beer, I think the use of first wort hops discussed here, gives a nice profile of everything the Northern Brewer hops have to offer... even though this fermented all the way down to 1.009, there is surprising body and balance to the hops, maybe this has to do with the protein rest as well? Head retention is good with some nice lacing... overall a very drinkable beer that profiles the hops nicely while not overpowering those not into IPA's... at least judging from the how much my brother-in-law enjoys it (and he dislikes IPA's)...
The second keg is naturally carbonated and is destined for my best friend's bachelor party... which is kind of a bummer because I selfishly want to keep it all for myself, but it will be nice to see how the "public" reacts to it...
Also, side note... Black Fri.P.A. is finally kicked... thank god. That underwhelming beer has been taking up valuable real estate in my kegerator for like 4 months... now I can keg and carb the India Pilsner Ale (also for bachelor party) and cold crash the second keg of California Common.
That's it for now... sorry no pics... my droid's camera has been acting funny lately... Later.
Saturday, May 5, 2012

Saturday, March 31, 2012
Overdue Update and India Pilsner Ale Brewday...
I know... I know... it's been forever since I posted... sry.
Just to bring you up to date:
Black Fri.P.A. posted here and here... is still on tap...
Things I learned about black IPAs:
1. If I brew this in the future, more hops... especially aroma and dryhop... this came out more like a hoppy porter than anything IPA-ish.
2. Black IPA is kind of a novelty style... and ten gallons of black IPA is a lot. I get tired of the style quickly... If not for all the commercial bottles and wine I've been drinking to change things up, I might have ended up dumping or pulling the second keg out of the kegerator and sticking it in the corner for a few months... hence the reason that it's still on tap almost 3 months later.
California Common (aka Steam beer) posted here... is kegged and carbonating. To be honest I kinda forgot about this one while it was ferementing at 55 degrees, 8 weeks in primary and it finished at 1.009 from 1.054 which is kinda low for the style, but it was crystal clear and the gravity sample tasted great. I'm currently force carbonating one keg in my kegerator and I primed the other to naturally carbonate at ambient temps...
Cellar Party: A couple weeks ago, myself and a few of my beer geek friends got together and all brought old and/or rare bottles for a tasting party...

Over 150$ worth of beer, oldest bottle was from 2005... Among the beers tasted that night: New England Brewing Co. Imperial Stout Trooper (2011), Deschutes The Abyss (2007), Berkshire Brewing Co. Russian Imperial Stout (2011?), Rodenbach Vintage Oak Aged Ale Barrel No. 230 (2007), Brooklyn Brewery Black Ops (2011), DFH Noble Rot (2011), Coastal Extreme brewing Co. Newport Storm Barleywine (2005), Oskar Blues Ten Fidy (2011?), Laughing Dog Brewery The Dogfather (year?), DFH Olde School (2010), Alchemist Beer Heady Topper (one of the best IIPA's I've ever had...), Sierra Nevada Hoptimum (2012)
Good friends, tons of great beer... a great time was had by all... and I earned like 4 badges on Untappd. Great, great night.
India Pilsner Ale Brewday: About a year ago, at a local brewpub I had this great IPA made with all pilsner malt... it was hazy, super pale, and had a great floral and citrus hop profile. The brewmaster himself was kind enough to share the ingredients and target gravity with me, though he left weights and times up to me to figure out... I brewed a 5 gallon batch of this last year (before I started this blog) and it turned out great, one of my favorite homebrews to date. last Sunday I brewed up a ten gallon batch an it's currently fermenting in my closet at 65 degrees (my basement is still too cold for Ales...)
Here's the recap...
Recipe for 11 gallons:
26lbs German Pilsner Malt (I used Belgian last time but my brewstore was out)
Single infusion mash at 154 degrees (nailed strike temp this time.)
Double batch sparge, actually, doing a kinda combination batch/fly sparge now... my ten gallon igloo cooler won't fit enough water for a single batch sparge, so I dump in sparge water until the cooler is brimming, let sit about ten minutes and start draining... as it drains, i slowly add remaining sparge water to maintain full level... then let drain completely before repeating for second sparge.
90 minute boil (pilsner malt contains a lot of DMS, which will add a buttery creamed corn flavor... so the longer boil makes sure to drive all that out.)
start hop schedule with 60 minutes left in the boil...
60 minutes: 1.5oz Summit hops for bittering
30 minutes: 1oz of Cascade and 1oz of Centennial hops for flavoring
5 minutes: 1oz of Cascade and 1oz of Centennial hops for Aroma
Dryhop: each fermentor for 1 week with 1oz of Cascade and 1oz of Centennial hops for Aroma
I didn't bother with Whirlfloc, with all that Pilsner Malt and no protein rest, there is no way this is going to clear anyway...
US-05 dry yeast... I tend to use clean simple dry yeast for hop and malt centric beers, I save the expensive liquid yeasts for Belgians and Steam Beer where the yeast is a major contributor flavor...
This brewday was a breeze... I'm really getting my ten gallon process down... total zen mode even though life is full of turmoil at the moment. Actually that's what I really love about brewing... aside from having a ready supply of good beer on tap in my own home, it's the actual process that I love. No matter what is going on in my life, no matter what I'm stressing or obsessing about, work... kids... whatever... it all goes away when I'm brewing, it really is like 6-8 hours of meditation for me. I feel physically exhausted (in a good way) and mentally recharged after a quiet brewday.
However, I did hit a few snags... My target gravity was 11 gallons at 1.070 gravity and I usually get 83% efficiency... I ended up with 12 gallons at 1.054 giving me 71% efficiency... I didn't get the boil off rate I was expecting so it ended up a little watered down, not sure why efficiency was so low (for me... I am aware that this is a perfectly acceptable efficiency for most All Grain brewers) it's nbd... the finished beer will just be lower alcohol, maybe a little less body, and hoppier... but hoppy is good, so...
To finish off... A wise man from my past once told me, "Life happens." Well, I am in the midst of a lot of personal turmoil and change... unfortunately some of those changes may affect the frequency of my brewing... hoping to do my best to brew when I can because brewing soothes my soul. But I will try to keep up on the blog when I can... thinking of doing some reviews of commercial brews... local brewpubs.. stuff like that...
Actually, if any commercial breweries out there would like me to blog reviews of their beers, I would be happy to oblige for a free sample or two... I did this for Bison Brewing Co., posted here... My contact info can be found on my profile... just throwing it out there...
Sorry no lolz... not feeling lolzy... self reflection is where it's at right now. That's it for today... I'll be around... Later.
Just to bring you up to date:
Black Fri.P.A. posted here and here... is still on tap...
Things I learned about black IPAs:
1. If I brew this in the future, more hops... especially aroma and dryhop... this came out more like a hoppy porter than anything IPA-ish.
2. Black IPA is kind of a novelty style... and ten gallons of black IPA is a lot. I get tired of the style quickly... If not for all the commercial bottles and wine I've been drinking to change things up, I might have ended up dumping or pulling the second keg out of the kegerator and sticking it in the corner for a few months... hence the reason that it's still on tap almost 3 months later.
California Common (aka Steam beer) posted here... is kegged and carbonating. To be honest I kinda forgot about this one while it was ferementing at 55 degrees, 8 weeks in primary and it finished at 1.009 from 1.054 which is kinda low for the style, but it was crystal clear and the gravity sample tasted great. I'm currently force carbonating one keg in my kegerator and I primed the other to naturally carbonate at ambient temps...
Cellar Party: A couple weeks ago, myself and a few of my beer geek friends got together and all brought old and/or rare bottles for a tasting party...

Over 150$ worth of beer, oldest bottle was from 2005... Among the beers tasted that night: New England Brewing Co. Imperial Stout Trooper (2011), Deschutes The Abyss (2007), Berkshire Brewing Co. Russian Imperial Stout (2011?), Rodenbach Vintage Oak Aged Ale Barrel No. 230 (2007), Brooklyn Brewery Black Ops (2011), DFH Noble Rot (2011), Coastal Extreme brewing Co. Newport Storm Barleywine (2005), Oskar Blues Ten Fidy (2011?), Laughing Dog Brewery The Dogfather (year?), DFH Olde School (2010), Alchemist Beer Heady Topper (one of the best IIPA's I've ever had...), Sierra Nevada Hoptimum (2012)
Good friends, tons of great beer... a great time was had by all... and I earned like 4 badges on Untappd. Great, great night.
India Pilsner Ale Brewday: About a year ago, at a local brewpub I had this great IPA made with all pilsner malt... it was hazy, super pale, and had a great floral and citrus hop profile. The brewmaster himself was kind enough to share the ingredients and target gravity with me, though he left weights and times up to me to figure out... I brewed a 5 gallon batch of this last year (before I started this blog) and it turned out great, one of my favorite homebrews to date. last Sunday I brewed up a ten gallon batch an it's currently fermenting in my closet at 65 degrees (my basement is still too cold for Ales...)
Here's the recap...
Recipe for 11 gallons:
26lbs German Pilsner Malt (I used Belgian last time but my brewstore was out)
Single infusion mash at 154 degrees (nailed strike temp this time.)
Double batch sparge, actually, doing a kinda combination batch/fly sparge now... my ten gallon igloo cooler won't fit enough water for a single batch sparge, so I dump in sparge water until the cooler is brimming, let sit about ten minutes and start draining... as it drains, i slowly add remaining sparge water to maintain full level... then let drain completely before repeating for second sparge.
90 minute boil (pilsner malt contains a lot of DMS, which will add a buttery creamed corn flavor... so the longer boil makes sure to drive all that out.)
start hop schedule with 60 minutes left in the boil...
60 minutes: 1.5oz Summit hops for bittering
30 minutes: 1oz of Cascade and 1oz of Centennial hops for flavoring
5 minutes: 1oz of Cascade and 1oz of Centennial hops for Aroma
Dryhop: each fermentor for 1 week with 1oz of Cascade and 1oz of Centennial hops for Aroma
I didn't bother with Whirlfloc, with all that Pilsner Malt and no protein rest, there is no way this is going to clear anyway...
US-05 dry yeast... I tend to use clean simple dry yeast for hop and malt centric beers, I save the expensive liquid yeasts for Belgians and Steam Beer where the yeast is a major contributor flavor...
This brewday was a breeze... I'm really getting my ten gallon process down... total zen mode even though life is full of turmoil at the moment. Actually that's what I really love about brewing... aside from having a ready supply of good beer on tap in my own home, it's the actual process that I love. No matter what is going on in my life, no matter what I'm stressing or obsessing about, work... kids... whatever... it all goes away when I'm brewing, it really is like 6-8 hours of meditation for me. I feel physically exhausted (in a good way) and mentally recharged after a quiet brewday.
However, I did hit a few snags... My target gravity was 11 gallons at 1.070 gravity and I usually get 83% efficiency... I ended up with 12 gallons at 1.054 giving me 71% efficiency... I didn't get the boil off rate I was expecting so it ended up a little watered down, not sure why efficiency was so low (for me... I am aware that this is a perfectly acceptable efficiency for most All Grain brewers) it's nbd... the finished beer will just be lower alcohol, maybe a little less body, and hoppier... but hoppy is good, so...
To finish off... A wise man from my past once told me, "Life happens." Well, I am in the midst of a lot of personal turmoil and change... unfortunately some of those changes may affect the frequency of my brewing... hoping to do my best to brew when I can because brewing soothes my soul. But I will try to keep up on the blog when I can... thinking of doing some reviews of commercial brews... local brewpubs.. stuff like that...
Actually, if any commercial breweries out there would like me to blog reviews of their beers, I would be happy to oblige for a free sample or two... I did this for Bison Brewing Co., posted here... My contact info can be found on my profile... just throwing it out there...
Sorry no lolz... not feeling lolzy... self reflection is where it's at right now. That's it for today... I'll be around... Later.
Friday, January 27, 2012
California Common Brewday (In Over My Head and Total Cagematch)
So after the troubles with fermentation temps in my basement, I decided to brew something that would that would be ideal for the cold winter temps..


I had a year old sample of Wyeast 2112 (a lager yeast that thrives from 58 to 68 degrees) sitting in the fridge for almost a year. I successfully built up the sample with two steps of starters giving me enough yeast to pitch into a 10 gallon batch. So, given the fact that my basement was 58 degrees, and I happened to have just the right yeast sitting around, I decided to brew a California Common. (Think Anchor's Steam Beer)
I have brewed this style before (it was even my first extract brew) but I decided to start from scratch on the recipe, just so I could call it my own... First I'll give you the ingredients of the recipe, disclaimer: I typically get 83-ish % efficiency, you may need to adjust to your own efficiency.
For 11 gallon batch:
17 lbs 2row
2.5 lbs Crystal 60L
60 minute boil:
1.75 oz Northern Brewer pellet hops 12.3% AA FWH
1 oz Northern Brewer whole leaf hops9.2% AA 20min
1 tablet Whirlfloc 20min
1 oz Northern Brewer whole leaf hops 9.2% AA 5min
0.25 oz Northern Brewer pellet hops 12.3% AA 5min
First of all, I got a grain mill for Christmas... I was excited to use it for the first time, but I get such great efficiency from the crush at my brewstore, I was a little worried about not crushing fine enough and getting poor efficiency or crushing too fine and getting a stuck sparge. Actually this was the one part of the brewday that went perfectly... my normal high efficiency and no signs of a stuck sparge.

A tip I read on the message boards, I used a credit card to measure the gap on the rollers of my grain mill. I then ran a little bit of grain through and made small adjustments until I liked the look of the crush.

New mill ready to go, full hopper and drill hooked up to drive shaft to make milling faster and easier...

Close up view of the resulting crush, really happy with results. I think I will probably never mess with the settings again...
Normally with All Grain using a cooler for the Mash Tun, you would mix a measured amount of hot water at a certain temp with your grain and hope to hit your conversion rest temp (like 154 degrees) and then leave it there foe 60 minutes while conversion takes place. But... you can make it more complicated... You can do what's called a step mash. A simple example for a step mash would be to mash in at 133 degrees for the protein rest (protein rest can add body and clarity) and let it rest for 20 or so minutes, then raise the temp to your normal conversion rest (154 in this case), rest for an hour, then mash out and continue per usual.
There are a few ways to raise that temp, I'll only talk about those using a cooler where adding external heat with a burner is not an option (bc that's how I roll)...
For a simple step mash you would mash in to 133 with a very thick mash (I like 1.125 quarts of water per pound of grain) let it rest, then calculate how much boiling water (212 degrees obv) to add to bring it up to your target temp. Add that, stir it in, hit your conversion temp, and proceed with your normal process...
Also, there is a method called decoction... Mash in to 133 for your protein rest, with a normal grist to water ratio (say 1.5qt to 1lb grain) let rest, scoop out a measured amount of the mash (more grist than water) heat to conversion rest temp, let it rest a short period, then heat to boiling temp. Return decoction to main mash and this should bring the total mash temp up to your conversion temp...
I had never done either before this batch... I was going big and trying the decoction method, but did it work out?? not so much...
I mashed in at 1.125 qt/lb and hit my 133 degree protein rest. I let it rest 10 minutes while I pulled my decoction. Following the advice of my local brewstore, I used a colander to pull the decoction to keep it as dry as possible... I pulled 8 qts of grain and started heating over a low flame on my smaller turkey fryer while stirring constantly. Here were my issues in numbered list format:
1. due to dryness of grist, no matter how much I stirred, I could not get consistent temp readings...
2. no matter how much I stirred, the grist burned to the bottom of the pot. I think even the low flame was too hot... next time I'll do it on the stove.
3. when I thought I had most of the grist up to 212 degrees I added it back to the mash (leaving behind the burnt stuff) and it only brought my main mash temp up 2 degrees. Conversion will NOT happen at 135 degrees.
So... because I mashed in on the dry side I was able to add boiling water to the mash to bring up the temp, I hit 152 and let it rest for conversion. The downside of this, was that I had not calculated the additional strike water, so I had to compensate by reducing sparge water so I would still hit my desired preboil volume...
After that mess... I proceed with mash out (including First Wort Hops (discussed in Black Fri.P.A. Brewday)), sparge, boil with all hop additions as listed... Normally I use hop pellets because they are easy, but my brewstore only had 2 oz of Northern Brewer in pellets and I had to take the rest in whole leaf... Never. Freaking. Again. After chilling, I started to drain the keggle into the fermentors... The whole hops clogged it immediately. I tried using the siphon action of lifting the drain hose up to back flow and loosen things up... fail. I tried stirring things up with my brewing ladle while trying to drain... also fail. I tried washing and sanitizing my arm and reaching in to loosen things up... also also fail. I tried to use my autosiphon to siphon out of the keggle and into the fermentor, that clogged too... also also also fail. I ended up having to literally ladle 11 gallons of wort from the keggle to the fermentors... at least it was well aerated... So I had chilled all the way down to 60 degrees (I usually call it good at 70), this yeast likes it cold...
This brewday was a slugfest from beginning to end, but I think I came out the winner...I took gravity reading: 1.054, 81% efficiency, IBUs (international bittering units) calculated at 52.5, and color calculates at 10 degrees SRM... All that means is, so far, (I think) I have hit all the specs for the California Common style dead on. And with the long protein rest, whirlfloc, and high flocculation of the yeast strain, this should get super clear. And as a bonus, I picked up no hint of the burned grist in the gravity sample, though I'm keeping my fingers crossed for the final product...
Drinking my Black Fri.P.A tonight, which is fiiiinaly on tap after 8 weeks of slow fermentation. pretty happy with it, wishing for more hop aroma, thinking maybe of dryhopping in second keg, we'll see.

That's it for now... my hands are cramping, and if you read this far, I'm sure you've had enough... Later!
Sunday, January 8, 2012
Managing Fermentation... Lesson Learned.
So it's been 5 weeks since the Black Fri.P.A. brewday and it's still sitting in the fermentors waiting to be dryhopped. Normally this would mean I was just being lazy and hadn't gotten around to kegging... but this time I have been watching it closely and it's just not done. 5 weeks! Primary fermentation should have taken a week, two at the most... What the heck?! SPOILER ALERT! The main issue here is temperature... Here's how it played out...
11/26 Brewday, split batch into two fermentors pitched 1 packet of US-05 dry yeast into each fermentor. Basement is about 65 degrees, perfect temperature for fermenting a nice clean American IPA (in this case Black IPA) LCD thermometer on side of fermentor is reading 70 through the first few days of active fermentation.
Over the next 3 weeks, as winter creeps in, temp in basement where the fermentors are located slowly drops to around 55. LCD thermometer slowly drops to ambient temp and I assume fermentation is done. I follow my long primary rule and do not touch for three full weeks.
After 3 weeks is up, I take a gravity reading to see where it finished at. I'm expecting it to be low (like 1.010), because I mashed low (147 degrees). But surprise! 1.020! after 3 weeks... What you got there is a stuck fermentation... With extract brewing, this can be expected, I never had an extract beer finish lower than 1.020. But with All Grain, I have never had one finish higher than 1.014... Now, if I was bottling this would be a major issue. If I were to bottle before fermentation was complete, it could start up again spontaneously. The yeast consuming those residual sugars would build up enough pressure in the sealed glass bottles that they would explode. And if you are married, there's no better way to end your homebrewing career than to have a closet full of beer bottles exploding and making a huge mess...
But I keg... so it's not really that big of a deal. If fermentation starts up again, the worst that could happen is the beer will get overcarbonated, and I can fix that by bleeding off pressure and letting it sit. My concern is the taste. An IPA is supposed to be crisp, dry, and bitter... At 1.020 there are enough sugars left that it tastes just a little too sweet. So I would like it to finish lower, ideally under 1.014 IMO...
So I took some action, nothing drastic, I didn't pitch more yeast (yet)... I moved the fermentors upstairs where the temp is a little warmer (65 degrees (I'm cheap, ok? No judge...)) and I gave the buckets a swirl to try and rouse the yeast.


I probably won't be brewing for 2 weeks, so if it works, I have time to build it up a few times with progressively bigger starters so that I have plenty of yeast for a 10 gallon batch. Reusing this yeast will cut $8 off the cost of brewday... And if it doesn't work, nbd I can buy some fresh yeast and all I've lost is 3/4 cup of dry extract. While this isn't cutting edge, it's a fun experiment for me. Stay tuned for that also...
11/26 Brewday, split batch into two fermentors pitched 1 packet of US-05 dry yeast into each fermentor. Basement is about 65 degrees, perfect temperature for fermenting a nice clean American IPA (in this case Black IPA) LCD thermometer on side of fermentor is reading 70 through the first few days of active fermentation.
Over the next 3 weeks, as winter creeps in, temp in basement where the fermentors are located slowly drops to around 55. LCD thermometer slowly drops to ambient temp and I assume fermentation is done. I follow my long primary rule and do not touch for three full weeks.
After 3 weeks is up, I take a gravity reading to see where it finished at. I'm expecting it to be low (like 1.010), because I mashed low (147 degrees). But surprise! 1.020! after 3 weeks... What you got there is a stuck fermentation... With extract brewing, this can be expected, I never had an extract beer finish lower than 1.020. But with All Grain, I have never had one finish higher than 1.014... Now, if I was bottling this would be a major issue. If I were to bottle before fermentation was complete, it could start up again spontaneously. The yeast consuming those residual sugars would build up enough pressure in the sealed glass bottles that they would explode. And if you are married, there's no better way to end your homebrewing career than to have a closet full of beer bottles exploding and making a huge mess...
But I keg... so it's not really that big of a deal. If fermentation starts up again, the worst that could happen is the beer will get overcarbonated, and I can fix that by bleeding off pressure and letting it sit. My concern is the taste. An IPA is supposed to be crisp, dry, and bitter... At 1.020 there are enough sugars left that it tastes just a little too sweet. So I would like it to finish lower, ideally under 1.014 IMO...
So I took some action, nothing drastic, I didn't pitch more yeast (yet)... I moved the fermentors upstairs where the temp is a little warmer (65 degrees (I'm cheap, ok? No judge...)) and I gave the buckets a swirl to try and rouse the yeast.

After moving and swirling, I left them alone for another two weeks... I peeked today, there was a thin layer of foam on the surface of each... it looks like both are still in an active (but very slow) fermentation. I took a gravity reading and the left one was at 1.018, and the right 1.014... Come on! 5 weeks!
But I'm just gonna be patient (lazy) and test them in another week. If gravity readings are unchanged in a week, I will consider more drastic measures... (repitching yeast and putting in a warm bath) Stay Tuned...
So how can this issue be avoided? The easiest way is to choose your style based on the current or upcoming conditions... In the summer when it's consistently 80 degrees, you don't kill yourself trying to keep fermentation temps low on your American Pale Ale, brew a Saison or a Belgian style that uses a strain of yeast that likes the warm temps. Conversely, when your basement is 55 degrees in the winter, you can start thinking about Lagers... ok, maybe 55 is too high for lagers... But! Ever had an Anchor Steam Beer? I have, and I totally love it... Steam Beer is this old style of lager from gold rush California era. This style uses a unique Lager strain of yeast that is OK fermenting at the low end of Ale temperatures. Not many breweries still make this style. Anchor Brewing out of San Francisco is considered the standard of the style. And it's delicious... think American Pale Ale, but with more fruity esters and instead of citrusy hops, they are earthy and woodsy... mmmm...
So can you guess what I'm planning for my next brewday? Also, that kinda leads into the other brewing related thing I did today... I brewed a California Common (Official name of the Steam Beer style) last January and right before the keg kicked, I filled a few bottles with my beer gun. Well the keg kicked on the fourth bottle and I ended up with 3/4 of a bottle with 2 inches of Wyeast 2112 yeast on the bottom. Instead of dumping it, I sealed it up and stuck it in the back of the fridge and forgot about it.
I took it out and opened it the other day... It was crystal clear and still had plenty of carbonation despite being filled off the keg and having a ton of headspace. I poured off the beer leaving the 2 inches of yeast sludge in the bottle. It was delicious... no sign of infection after a year, so I sealed up the bottle of yeast again and stuck it back in the fridge. Today I decided to make a starter with it.

Growler I'm using to make the starter on the left, grolsch bottle containing year old yeast slurry on the right.
That's it for tonight, Later...
Edit: Apparent active fermentation on the Wyeast 2112 experimental (to me) starter... 3/4 inch krausen and smells like fresh bread dough... good signs!
Edit: Apparent active fermentation on the Wyeast 2112 experimental (to me) starter... 3/4 inch krausen and smells like fresh bread dough... good signs!
Saturday, December 3, 2011
Black Fri.P.A (Black Friday Black IPA)
So... what's better than waiting outside all night in the cold to line up and participate in the mindless consumerism that is Black Friday??? Sleeping in and brewing, that's what. I did the all nighter at Best Buy thing one year... it was terrible... never again. Now I find more constructive ways to spend the day after Thanksgiving... This year, I brewed a Black IPA for the first time.

But first... tonight I'm drinking my Imperial Pumpkin Ale.

This is the S-04 yeast version of my Pumpkin Ale... I'm a little bummed, I'm not totally in love with it this year. It's not full terrible, totally drinkable, but just a little off. I'm thinking the cause might be the weak boil I had due to the way the keggle was sitting on my new burner. One of the reasons we boil the beer for an hour or more is to boil out impurities like DMS. While the grain I used for this beer isn't especially high in DMS like say pilsner malt, it's still present. My palate isn't trained enough to figure out if there is just a little DMS in the pumpkin ale, but I think something isn't right... I plan on bottling and bringing some down to the brewstore, the guys there can tell me what's up.
So that leads me to the first project of brewday, modifying my new burner to get the most out of it. I need to be able to get a decent boil in my keggle for these ten gallon batches.


hop schedule is:
2 oz Centennial hops FWH
2 oz Cascade hops at 45 minutes
2 oz Willamette hops at 15 minutes
2 oz Cascade hops at flame out
2 oz Cascade hops dryhop 1 week
 The FWH in the kettle as first runnings are draining in... Also, check out that color! Hence the name Black IPA...

 Draining boiled and chilled wort into the first of the two fermentors. I couldn't get over the color... this is my first All Grain dark beer, and I was a little doubtful that I would get black beer from what looked like a relatively normal colored grain bill... Just using dry yeast (US-05) in both fermentors for this batch, nothing exciting. But IPA isn't really about the yeast, it's about the hops.
 My pre-pitching gravity sample... 1.072 84% efficiency FTW!
Two fermentors are now chugging away, nice and cool in the basement. Fermenting at 65 degrees should give a nice clean ester profile from the yeast and let the hops and malt really shine through. I'll let them sit for a few weeks, add the dryhops and let sit another week before kegging.
So... What's next for HRA? Well, after spending almost $80 (paying full retail at hombrew store) in ingredients on this brewday, I think it's time I started making this hobby more cost effective. It's been said before, if you are looking to get into homebrewing to save money, you won't. There is always equipment to buy, things to build... but there are savings to be had on brewday. There are several ways to save a buck without sacrificing the quality of your beer. Buying grain and hops in bulk and washing/reusing yeast are the first two that come to mind. There are a few pieces of equipment needed to do these, but these ones actually pay for themselves in just a few batches (total justification!) I'll be talking about them as they come along, but that's the direction I'm going right now... That's it for now... Later.
So that leads me to the first project of brewday, modifying my new burner to get the most out of it. I need to be able to get a decent boil in my keggle for these ten gallon batches.

Here's the issue... the pot is supposed to sit down inside the upper ring, 3 inches above the burner. Keggle sits with upper ring just inside the bottom rim of keggle and the bottom of the keggle actually sits more like 6 inches off the burner. So I need to get the burner about 3 inches closer to the bottom of the keggle.
I started by raising up the lower collar that houses the burner assembly. Unbolted, drilled new holes about an inch higher up on the legs, slid collar up (and burner with it), and bolted into place. Burner now sits 5 inches below the bottom of the keg. Next I unbolted the upper ring, and bobbed about 2 of the 3 inches off of the upper legs with sawzall... drilled new holes in the remaining 1 inch stubs and bolted ring back in place. And the keg now sits 3 inches over the burner, perfect... almost... now the keggle is now placed precariously on the upper ring. A ten gallon spill would be pretty awful, so I looked around and found the grate from my old charcoal grill would be the perfect thing to lay over the top of the burner and sit the keggle on. Kinda ghetto (that's how I roll)... but it works.
Edit: forgot to add the after pic of burner mod...

Drastic difference in height... Also, as an added bonus I think this burner will hold up better to the wind now.
On to the brewday! Been wanting to do a Black IPA (AKA Cascadian Dark Ale) for a while now, and what better time than Black Friday? I borrowed the recipe from Scooby_Brew on HBT (found here) I adapted the recipe to my expected efficiency (about 83%) and came out with this for an 11 gallon batch:
21 lbs American 2 row
2 lbs Crystal/Caramel 10L
2 lbs Carafa II Special
1 lb Special Roast

So 26 lbs of grain at 1.125 qt/lb (my typical water/grist ratio) is just about the absolute max my 10 gallon mash tun can handle... I was shooting for 152 degree mash temp... I missed low at 147, but since my tun was too full to add hot water to raise it up, I had no choice but to roll with it.
For my hop schedule I decided to try something new on this IPA. Typically all hops are added during the boil. bittering hops at 60 minutes, flavor hops at 30ish aroma hops at 15 or less... In lieu of the 60 minute addition I chose to use First Wort Hops. Hops are added to the kettle as the first runnings are coming out of the Mash Tun. They just hang out there in the hot, unboiled wort for the entire mash out, sparge, and heating to boil processes...
hop schedule is:
2 oz Centennial hops FWH
2 oz Cascade hops at 45 minutes
2 oz Willamette hops at 15 minutes
2 oz Cascade hops at flame out
2 oz Cascade hops dryhop 1 week


Getting a little more comfortable with my ten gallon process, this brewday was a breeze. Total zen mode action happening here... So... triple batch sparge (I've found my mash tun is not big enough to handle enough water to do just two sparges), 60 minute boil (much improved due to burner modifications), chill, and drain...


Two fermentors are now chugging away, nice and cool in the basement. Fermenting at 65 degrees should give a nice clean ester profile from the yeast and let the hops and malt really shine through. I'll let them sit for a few weeks, add the dryhops and let sit another week before kegging.
So... What's next for HRA? Well, after spending almost $80 (paying full retail at hombrew store) in ingredients on this brewday, I think it's time I started making this hobby more cost effective. It's been said before, if you are looking to get into homebrewing to save money, you won't. There is always equipment to buy, things to build... but there are savings to be had on brewday. There are several ways to save a buck without sacrificing the quality of your beer. Buying grain and hops in bulk and washing/reusing yeast are the first two that come to mind. There are a few pieces of equipment needed to do these, but these ones actually pay for themselves in just a few batches (total justification!) I'll be talking about them as they come along, but that's the direction I'm going right now... That's it for now... Later.
Sunday, November 13, 2011
B- Cider and Pumpkin Ale Continued...
Hey folks...



Tonight I'm drinking my Autumn Dream Cider... Overall I'm giving it a B-, I'm a little disappointed and I had high hopes for this batch. It tastes good, but I think it's a little too acidic. I can only drink one or two without feeling like I need to take a few TUMS... and it seems to be getting worse as it ages. The only real change I made to the recipe from last year, is that I threw in a few more handfuls of dried cranberries than previously and I think that is the problem. Now I know... Also, this batch does not seem to be clearing at all... I have some finings (additive to help clear beer, wine, cider, etc...) that I didn't end up using and I wish I had tried them. I still have them and will probably try them on my next cider batch.
Also, I have had my Pumpkin Ales sitting in fermentors for almost 5 weeks. Normally I am rushing things and doing things too soon, but I just have not had the energy lately. In this case, the extra time fermenting will only make things better. Anyway, between small home improvement projects today, I managed to gravity test these two and get them into kegs.
So, if you recall, I used two different yeasts on this 10 gallon batch. Yeast is the only difference here so this is kind of a learning experience. Like the Sam Adams Latitude 48 Deconstructed 12 pack, I can compare the difference a single ingredient can make. After starting with the same 1.079 original gravity wort, the different yeasts produced very different results...

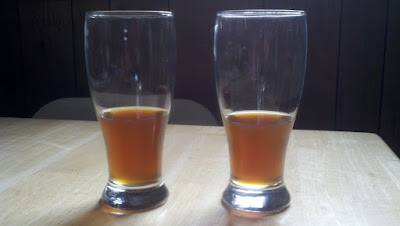
The gravity samples...Wyeast 3522 Belgian Ardennes yeast on the left, Fermentis S-04 on the right. They look the same in this pic... (nice color huh?) but IRL, the S-04 cleared quite a bit more than the Ardennes.
The smells are also different... the S-04 smells mainly of pumpkin and malt pretty good... not much spice but nice. The Ardennes though... smells AMAZING! pumpkin, malt, and just the right amount of that Belgian funk...
Also, also... The S-04 fermented from 1.079 down to 1.014. That is exactly what I was shooting for, and that makes the ABV 8.5%, right on target... But, the Ardennes started with the same exact wort and took it down to 1.010! A little drier, maybe thinner body, and 9.0% alcohol! That's a big badass Belgian!
After tasting both, I decided to go ahead and add more pumpkin pie spice to both as I kegged them. While I think the Belgian might have been interesting enough without the extra spice I wanted to keep the yeast the only variable for comparison so I did spice both.
But there is going to be one other difference. See I only have room to force carbonate (the way I usually do it) one of these kegs in my kegerator right now... but there is another way to carbonate. As you would in bottling, once the yeast has consumed all the sugar it can in the beer (which, after 5 weeks, it has) you add a measured amount of sugar and put the beer in a sealed vessel (bottles or keg) The suspended yeast wakes up, fermentation starts up again producing CO2. Because it is in a sealed vessel, the CO2 has nowhere to go except into suspension, carbonating the beer. I decided to force carb the S-04 keg to have on tap first and keg condition (carbonate with sugar) the Belgian outside the kegerator while I am drinking the normal one.

To add the spice to the regular pumpkin ale, all I did was boil 2 cups of water and add 2 tablespoons of pumpkin pie spice. I boiled this for 5 minutes and added to the clean, sanitized, empty keg. Then I racked (siphoned) the beer into the keg, purged the headspace with CO2 from my CO2 tank and regulator. I sealed it up with 30 psi and put in the kegerator to chill. I'll leave it 30 psi for 24 hours and then reduce to serving pressure (12psi) and it will be ready to drink in about a week.
For the Belgian Ardennes I added 3/4 cup (if bottling it would be more like 1 1/4 cups) DME (dry malt extract) to the spice/water mixture and boiled for 10 minutes. I used DME as the sugar for priming (carbonating) but you could use corn sugar too... I don't bother cooling it after boiling, 2 cups of boiling water won't bring the temp of 5 gallons up far enough to hurt the yeast. Again, added this mixture to clean, sanitized, empty keg, siphoned in beer, purge headspace, and seal up with 30psi. But this one I leave out at room temperature so the yeast can do their thing... should take 2-3 weeks but then I'll be able to tap and pour right away after chilling.
So... that's it for tonight I guess. Well, I am planning next beer. Thinking a porter, maybe play with different yeasts or maybe vanilla in half... we'll see... I do want to brew again soon, now that I am brewing double batches, it would be nice to get ahead instead of living brewday to brewday... know what I mean?
Later..
Wednesday, November 2, 2011
Bison vs. Guinness Stout Day Challenge... Total Official Review!
This totally exciting thing happened to me... I was picked by Bison Brewing Company as one of a handful of bloggers to compare their Organic Chocolate Stout to the biggest commercial example of a dry stout, Guinness Draught. Not really sure if I'm out of my league here, but I'll give it a shot...

With a little help from a pouring assistant (my wife), I started by tasting them blind. SPOILER ALERT: I didn't need to bother... it's pretty obvious. This is like comparing Bud Light to Sierra Nevada Pale Ale. It's not even in the ball park... After the blind tasting, the cat was out of the bag, so I sat down with each and gave them my best analysis...
It's been a few years since I had a Guinness, so I feel like I'm looking at them both fresh. The Guinness looked nice, just shy of black in color with the tademarked off-white creamy head. At first sniff, I honestly can't really smell anything. No aroma at all. Taking a sip, mouthfeel is thin, light, and watery. Mild muted roasty malt flavor with a pleasant bitterness. Dry but maybe not quite dry enough finish.

And the Bison... this really isn't fair... The Bison poured thicker, promising a thick silky texture. The color is black, like black black, like seriously... black. The real comparison in color becomes obvious when both are held up to the light... The light shows the Guinness to be more of a dark brown while the Bison holds up as just a shade off of the blackest black that ever blacked. The head on the bison was dark tan in color, not quite as thick and whipped cream looking as the Guinness. The head lasted well, though not as unnaturally long as Guinness... Bison totally kills it on the aroma... Dark roast coffee and unsweetened cocoa... and totally follows through on the taste. But the biggest difference here is the mouthfeel... Where the Guinness was thin and watery, the Bison was thick, viscous, and silky. It coated the tongue like the highest quality milk chocolate. While the texture was like milk chocolate, the flavor is closer to dark chocolate. I get black coffee, even french roast, or espresso... a nice lingering bitterness with very little remaining sweetness. The Bison ended with a nice dry finish that left me wanting another sip... GJ Bison, GJ... Later.
So, Bison Brewing sent me a tasting kit that included a bottle of their Chocolate Stout, a can of Guinness Draught, and a sweet Bison Brewing pint glass to add to my collection. This is the first beer I've tried from this brewery and the first stout of the year (totally been craving dark beers lately) Full disclosure, I totally have a wicked chest cold... and as I've said before my tasting skills are the worst... but here we go...

With a little help from a pouring assistant (my wife), I started by tasting them blind. SPOILER ALERT: I didn't need to bother... it's pretty obvious. This is like comparing Bud Light to Sierra Nevada Pale Ale. It's not even in the ball park... After the blind tasting, the cat was out of the bag, so I sat down with each and gave them my best analysis...
It's been a few years since I had a Guinness, so I feel like I'm looking at them both fresh. The Guinness looked nice, just shy of black in color with the tademarked off-white creamy head. At first sniff, I honestly can't really smell anything. No aroma at all. Taking a sip, mouthfeel is thin, light, and watery. Mild muted roasty malt flavor with a pleasant bitterness. Dry but maybe not quite dry enough finish.

And the Bison... this really isn't fair... The Bison poured thicker, promising a thick silky texture. The color is black, like black black, like seriously... black. The real comparison in color becomes obvious when both are held up to the light... The light shows the Guinness to be more of a dark brown while the Bison holds up as just a shade off of the blackest black that ever blacked. The head on the bison was dark tan in color, not quite as thick and whipped cream looking as the Guinness. The head lasted well, though not as unnaturally long as Guinness... Bison totally kills it on the aroma... Dark roast coffee and unsweetened cocoa... and totally follows through on the taste. But the biggest difference here is the mouthfeel... Where the Guinness was thin and watery, the Bison was thick, viscous, and silky. It coated the tongue like the highest quality milk chocolate. While the texture was like milk chocolate, the flavor is closer to dark chocolate. I get black coffee, even french roast, or espresso... a nice lingering bitterness with very little remaining sweetness. The Bison ended with a nice dry finish that left me wanting another sip... GJ Bison, GJ... Later.
Saturday, October 15, 2011
Pumpkin Ale... First Ten Gallon Brewday!!!
Breaking news! Hop River Ales is now a 0.3225806 barrel home brewery! Also, I love pumpkin beer. Well, let me rephrase... I love one commercial pumpkin beer. I've tried many, but the only one that really gets me is Dogfish Head's Punkin' Ale, all the others I have tried have been too much spice/not enough pumpkin or too much pumpkin/not enough spice. DFH nails it with Punk... So, with all the equipment to brew ten gallon batches complete and autumn in full swing, I decided to do my Pumpkin Ale recipe for my first ten gallon batch. I have brewed this recipe 1 1/2 times before (the "half" was my only ever failed batch due to a hopelessly stuck sparge)... I adapted the recipe from one I found on Homebrewtalk.com here: Reno eNVy's Punkin' Ale which is intended to be a clone of DFH's Punkin'. I made a few tweaks (less 2 row, real pumpkin, more brown sugar, different yeast, higher efficiency, etc...) hopefully enough to consider it my own, while giving credit to the original recipe. It came out amazing.
Here is my recipe for an 11 gallon batch. You may be wondering why I make an 11 gallon batch... after fermentation, a lot of sludge (called trub) ends up settled to the bottom of the fermentor. When transferring to keg or bottling, you want to leave this behind. In doing that you lose some beer. So, to end up with 10 gallons of clear finished beer, I have to make 11 gallons to start with.
Mash:
152 degree mash (was shooting for 154, but missed low and rolled with it) for 60 minutes
19 lbs American 2 row malt
2 lbs Crystal/Caramel 60L malt
2 lbs Victory malt
5 1/4 lbs Sugar Pumpkin (baked and pureed)
1 lb Rice Hulls
Mash is pretty straight forward for the experienced All Grain brewer. Except for the pumpkin... Here is how I prepare it.
I start with a 10 lb sugar pumpkin from the local country farm store. (I always go to The Hurst Family Farm for this type of thing, they may be the nicest people in the world...) I cut the pumpkin into eighths, remove the seeds, and lay in a 13x9 pan with an inch or so of water in it. Bake at 375 uncovered for about an hour or until the pumpkin starts to brown.


So you're probably thinking that fresh pumpkin seems like an asston of work, why not just use canned? Bc that's not how I roll. Canned pumpkin isn't even really pumpkin, it's closer to butternut squash. So if you're trying to make a Butternut Squash Ale, go ahead, used canned. But I'm making Pumpkin Ale! (does that make me a pumpkin snob??)
60 minute Boil:
2 oz Hallertau hops @ 60 minutes
3 lbs Light Brown Sugar @ 15 minutes
1 tablet Whirlfloc @ 15 minutes
3 Tablespoons Pumpkin Pie Spice @ 15 minutes (see notes)
1 oz Hallertau hops @ 5 minutes
1 oz Hersbrucker hops @ 5 minutes (substitution, this would have been another ounce of Hallertau but my brewstore only had 3 oz in stock)
Boil is pretty standard, the only real note I have is in the pie spice. In my successful 5 gallon batch I used 1.5 Tablespoons of spice in the boil. When tasting for the first time, there was not nearly enough spice. So I boiled 2 more tablespoons of spice in a quart of water for a few minutes and added right to the keg and it was perfect. I am essentially going to do the same thing again. I may try to just add the extra spice to the boil next time, but I was already experimenting on a few different fronts this time around so I didn't want to take the chance. Disclaimer: I used cheap Ocean State Job Lot pumpkin pie spice (it's what I had in the cabinet)... I cannot guarantee if you are using a fresh quality spice. I would recommend starting low as you can spice to taste at bottling/kegging.
With my efficiency, I ended up with 12 gallons (due to weaker than normal boil) of 1.078 gravity wort. If that ferments down to 1.014 like I did last time, that is a 8+% Alcohol beer. Could be considered Imperial, see why I dropped the extra 2 row malt? The efficiency is hard to calculate due to the unknown amount of fermentable sugars in the pumpkin, but I assume I'm in the low 80's...
Fermentation:
split between two fermentors
1 pack S-04 dry yeast
1 starter of Wyeast 3522 Belgian Ardennes liquid yeast
Here is where it gets experimental... Last time I used S-04 dry yeast instead of US-05 as in the original recipe. Feel free to correct me if I'm wrong, but I think S-04 does not ferment as low as US-05 so it will leave more body, sweetness and pumpkin flavor. I think it was perfect last time.
Since I brewed 10 gallons and my fermentors are really only for 5 gallon batches, I need to split the batch into two fermentors. This gives me the opportunity to use a different yeast in each fermentor. So I decided to get creative and do something fun for half of the batch. I used Wyeast 3522 Belgian Ardennes yeast in the second fermentor. This is the same yeast I used in my Belgian IPA found in my old blog posts here, here, and here. This yeast is incredibly active. I knew from experience that a simple airlock would not contain it, so I started out with a blowoff tube. Glad I did, within hours it was swelling up the top of the bucket and passing krausen through the tube. 6 days later it is still pushing stuff through the tube and it has clogged twice. So excited to try this...
So what about the ten gallon experience?? Well this 13 hour (I was still out brewing after dark) brewday was full of mistakes, bloopers, panic, and learning experiences. No zen this time, but I learned a lot. I'll post about my ten gallon process once I have it figured out better... for now, here are some pics:
 The color of this beer is amazing, check out the caramel colored first runnings coming from the mash out...

 So I filled the keggle on the ground and was going to pick it up full (bad idea) and put it onto the burner. I should have tested that with water. Turns out a full keggle weighs somewhere in the neighborhood of 150lbs...
 Another thing I should have tested... my burner could not hold the weight. So I went to the local hardware store where I remember them having a cast iron outdoor burner. It was gone and they looked at me like I had two heads when I asked about it. So to Home Depot, they should have it... right? nope. Lowes either... So my last chance was Cabella's, and they saved the day. Probably would have been dumping this batch if Cabella's had not had it.

 15 gallons fermenting in my basement... White topped fermentor is my Autumn Dream Cider, the other two is the split batch of Pumpkin Ale. The one on the left pushing all kinds of stuff through the blowoff tube is the Ardennes yeast. The S-04 also clogged the airlock and needed a blowoff tube but it was not nearly as dramatic as the Ardennes.
I will keep you updated with these batches, stay tuned... Later...
Here is my recipe for an 11 gallon batch. You may be wondering why I make an 11 gallon batch... after fermentation, a lot of sludge (called trub) ends up settled to the bottom of the fermentor. When transferring to keg or bottling, you want to leave this behind. In doing that you lose some beer. So, to end up with 10 gallons of clear finished beer, I have to make 11 gallons to start with.
Mash:
152 degree mash (was shooting for 154, but missed low and rolled with it) for 60 minutes
19 lbs American 2 row malt
2 lbs Crystal/Caramel 60L malt
2 lbs Victory malt
5 1/4 lbs Sugar Pumpkin (baked and pureed)
1 lb Rice Hulls
Mash is pretty straight forward for the experienced All Grain brewer. Except for the pumpkin... Here is how I prepare it.
I start with a 10 lb sugar pumpkin from the local country farm store. (I always go to The Hurst Family Farm for this type of thing, they may be the nicest people in the world...) I cut the pumpkin into eighths, remove the seeds, and lay in a 13x9 pan with an inch or so of water in it. Bake at 375 uncovered for about an hour or until the pumpkin starts to brown.


After baking, scoop pumpkin flesh from the skin, and discard the skin. Then I use an immersion blender to puree the pumpkin. I usually do this the day before and refrigerate.

But. The pumpkin is going into the mash, so there are a few things needed to handle it. Firstly, you need to compensate for the temp. 5-6 pounds of cold pumpkin will affect your mash temp. To deal with this, I heated up the pumpkin on the stove before mashing in... nbd.
Also... Rice hulls. I cannot stress enough. In my experience, nothing will stick a mash (everything in the mash tun congeals and won't drain) like pureed pumpkin. The second time I attempted this recipe was a nightmare. The mash stuck like cement, I had to pour back and forth between the tun and a 5 gallon bucket to unstick and that would last about 5 minutes of draining before sticking again. Then the sparge stuck... it was hopeless and I gave up and dumped it after 3 hours of this. Rice hulls will help keep things loose and flowing so use a lot. A half pound for 5 gallon or full pound for 10 may not be enough...
60 minute Boil:
2 oz Hallertau hops @ 60 minutes
3 lbs Light Brown Sugar @ 15 minutes
1 tablet Whirlfloc @ 15 minutes
3 Tablespoons Pumpkin Pie Spice @ 15 minutes (see notes)
1 oz Hallertau hops @ 5 minutes
1 oz Hersbrucker hops @ 5 minutes (substitution, this would have been another ounce of Hallertau but my brewstore only had 3 oz in stock)
Boil is pretty standard, the only real note I have is in the pie spice. In my successful 5 gallon batch I used 1.5 Tablespoons of spice in the boil. When tasting for the first time, there was not nearly enough spice. So I boiled 2 more tablespoons of spice in a quart of water for a few minutes and added right to the keg and it was perfect. I am essentially going to do the same thing again. I may try to just add the extra spice to the boil next time, but I was already experimenting on a few different fronts this time around so I didn't want to take the chance. Disclaimer: I used cheap Ocean State Job Lot pumpkin pie spice (it's what I had in the cabinet)... I cannot guarantee if you are using a fresh quality spice. I would recommend starting low as you can spice to taste at bottling/kegging.
With my efficiency, I ended up with 12 gallons (due to weaker than normal boil) of 1.078 gravity wort. If that ferments down to 1.014 like I did last time, that is a 8+% Alcohol beer. Could be considered Imperial, see why I dropped the extra 2 row malt? The efficiency is hard to calculate due to the unknown amount of fermentable sugars in the pumpkin, but I assume I'm in the low 80's...
Fermentation:
split between two fermentors
1 pack S-04 dry yeast
1 starter of Wyeast 3522 Belgian Ardennes liquid yeast
Here is where it gets experimental... Last time I used S-04 dry yeast instead of US-05 as in the original recipe. Feel free to correct me if I'm wrong, but I think S-04 does not ferment as low as US-05 so it will leave more body, sweetness and pumpkin flavor. I think it was perfect last time.
Since I brewed 10 gallons and my fermentors are really only for 5 gallon batches, I need to split the batch into two fermentors. This gives me the opportunity to use a different yeast in each fermentor. So I decided to get creative and do something fun for half of the batch. I used Wyeast 3522 Belgian Ardennes yeast in the second fermentor. This is the same yeast I used in my Belgian IPA found in my old blog posts here, here, and here. This yeast is incredibly active. I knew from experience that a simple airlock would not contain it, so I started out with a blowoff tube. Glad I did, within hours it was swelling up the top of the bucket and passing krausen through the tube. 6 days later it is still pushing stuff through the tube and it has clogged twice. So excited to try this...
So what about the ten gallon experience?? Well this 13 hour (I was still out brewing after dark) brewday was full of mistakes, bloopers, panic, and learning experiences. No zen this time, but I learned a lot. I'll post about my ten gallon process once I have it figured out better... for now, here are some pics:


So 10 gallon batches are heavy! (duh) This was my first attempt at staging things so it all flows downhill. My new neighbors probably think I'm making meth...


Full keggle sitting on new heavy duty burner... Unfortunately the rim of the keggle makes it sit a little high on the burner and it was hard to get a really good rolling boil. I'll be modifying the burner before my next brewday.

I will keep you updated with these batches, stay tuned... Later...
Keggle (not kegel (sry, still makes me lol)) Continued...
Well I finally got around to finishing the keggle... kinda... it's functional but not fully equipped yet. You can read the first half of the keggle saga (so dramatic) here: Keggle (not kegel) Workout... I last posted about the keggle all the way back in June, with the plan to get it welded and assembled within a few weeks. Fast forward four months and I finally have it complete to a point that I can actually brew with it. Quick recap: acquired old beat keg, cut off top, drilled two holes near bottom, had two couplings welded into drilled holes, and here we are...


Ok, so full disclosure, I'm using some brass parts... Not as sexy as stainless I know, but easier and cheaper to get. I know what you might be thinking, "Brass has lead, doesn't it?" Well, yes it does... a tiny bit... but consider what all the valves and fixtures in your home that you use every day are made from, and you're fine right? right. But... because it's so easy to do, I decided to "pickle" the brass parts. This leaches the lead from the surface of the brass so that the beer will never come into contact with the lead.

Solution is two parts white vinegar, one part hydrogen peroxide. Remove handle from ball valve. Soak brass parts for about 5 minutes at room temp. If it starts to turn green, you soaked it too long and need to start over with a fresh solution. Then just rinse and reassemble. Easy, peasy, mac and cheesy...

Why yes, I did use an old pickle jar to pickle the parts. Isn't it ironic?

Here you can see the couplings I had welded into the holes I drilled. Threaded both inside and outside the keggle so I can attach fittings in and out.

On the outside: On the left, 1/2" brass nipple into 1/2" ball valve for draining. On the right, just plugged for now, this port will be used for a combination thermometer and sight glass in the future. I can brew without them for now, but it will be nice to have. I'll save that for a future post.

Inside: Because the bottom of the keg is domed down, if I just used the ball valve on the side, like a full gallon of wort (unfermented beer) would be left behind when I drained. So I built a diptube to supply the ball valve drain from the very very bottom of the dome. I used a 1/2" male thread to sweat adapter, 1/2" copper tubing, and a 1/2" copper 90 degree elbow. In the pic nothing is soldered together, but it has since been soldered.

Here's a better visual of how the diptube goes into the ball valve. When test draining it left behind only a few drops... So... after cleaning, I have a fully functional 15.5 gallon brew kettle. Know what that means?? Ten. Gallon. Batches.

I was nervous about how heavy this thing was going to be when full. I'm guessing the keggle weighs something like 30-35lbs empty, add 12 gallons of wort (9-ish lbs/gallon) and you are talking about 145 lbs full. As Marty McFly would say, "That's heavy." I was scared that, sitting on top of my stainless turkey fryer burner it might wobble, tip, spill...
It was worse than I thought. My stainless burner could not withstand the total awesomeness of the keggle I built.
Hilarity ensued, when I drove around central CT on an October Sunday afternoon trying to find an outdoor propane burner out of season, while 13+ gallons of unboiled wort sat at home... But to hear how it turned out, stay tuned for my next post covering my first ten gallon (pumpkin) brewday... Total cliffhanger! Later...
Also, please take a second and take a look at my poll on the right (if reading on a mobile device click "view web version")
Also, please take a second and take a look at my poll on the right (if reading on a mobile device click "view web version")
Tuesday, October 4, 2011
Autumn Dream Cider... So Srs!
Well... the leaves are falling, it's rainiy and cold, and the Red Sox aren't in the playoffs (ugh) It's officially fall.


Tonight I put together my Autumn Dream Cider. This is my own recipe, I made it twice last year and it came out great. I've said it before, ciders are so easy... I actually put this together in 30 minutes while dinner was in the oven. This is different than the Summer Cider I did in May, a little crisper, drier, and more flavorful. This one has a few more ingredients and the extra step of steeping spices. It's not as cheap to make but it's pretty great.
Ingredients:
5 gallons Fresh Local Cider (must be no preservatives, check the label. If it has potassium sorbate in the ingredients, it won't work)
1 lb Light Brown Sugar
1 pack Mulling Spices (I cheat and use a whole spice blend that my country farm store makes and sells... looks like clove, allspice, star anise, dried orange peel, cinnamon sticks... etc.)
1 cup Dried Cranberries (I try to find ones that don't have corn syrup or preservatives added)
1/2 cup Raisins (just regular old raisins)
1 pack S-04 Dry Ale Yeast

I always prefer to use fresh local ingredients when I can, in the summer it's really hard to find cider at all never mind cider with no preservatives. For my Autumn Dream Cider, I like to use fresh local cider that I get from the country farm store down the street from me. (I also picked up a 10lb pie pumpkin for this weekend's brewday)
So, I take a half gallon of cider and pour into a 4qt pot and heat on low. While that is heating up, I do all my sanitizing per usual. Once the cider on the stove is warm, I stir in the full pound of brown sugar until it's all dissolved. Then I rough chop the cranberries and raisins and add to the hot cider. Let steep for about 15 minutes, don't boil! Unlike brewing beer, no one is going to complain about the smell.
Pour all that into a clean sanitized fermentor while still hot. Then pour the rest of the cold cider (4 1/2 gallons) into the fermentor. Pour from a few feet up and let it splash and foam to aerate (yeast need the oxygen to multiply and get started) I got a 1.052 starting gravity reading. The mixed temp of the 1/2 gallon hot and 4 1/2 gallons cold comes out to a nice cool temp for the yeast to get started.
I'll let this ferment down to 1.010 to 1.005 and I'll stop fementation there by cold crashing (transfer to keg and put in fridge) the cold will make the yeast go dormant and drop to the bottom of the keg. I might play with some finings at the point to get it extra super clear, we'll see... Later.
Thursday, September 8, 2011
Catching up and Cream Ale Brewday...
Part 3 on catching up... Ok, ok... I'll tell you the real reason I have gotten behind on blogging. I started reading The Game of Thrones books.. Total epic, lose track of what day it is, amazing series of books. Almost all my free time has been sucked into these books. It's like, if Lord of the Rings and raunchy HBO quasi-porn movies had a baby, and then that baby grew up and had a baby with the movie Braveheart... like that... but more epic... and bloodier... and raunchier... kinda... it's pretty great.
So I did manage to find time to brew... I did a recipe posted by a HBT member... Cream of Three Crops Ale, the style is a cream ale, and the three crops would be the barley, corn, and rice used in the mash, hence the clever name. The word is that this recipe tends to impress BMC (Bud Miller Coors) drinkers and while this isn't really my style, I didn't really brew this one for myself. I'm planning on having it on tap as a "thanks for helping me move" kinda thing. Yeah I'm moving, The HRA homebrewery is gonna have a new location... NBD, same town, more room and storage for all brewing related activities though!
I made a few small tweaks to the original recipe. Biermuncher's recipe is for a ten gallon batch, and I am still doing 5 gallons for now (hint hint) When converting to a 5.5 gallon recipe (the extra 1/2 gallon ends up getting lost to the trub at the bottom of the fermentor when transferring to keg... the price of clear beer) I shifted around the grain ratios a little. I also used all Hallertau hops bc I like 'em...
My recipe ended up being something like this:
5.5gal AG
5.5lbs American 2 row
2.5lbs Flaked Maize
1lb Instant Rice
1lb Rice Hulls (you'll def need 'em)
152 degree mash for 90 minutes
double batch sparge (no mash out)
90 minute boil
1.5oz Hallertau @ 60 minutes
1 whirfloc tablet @ 20 minutes (supposed to help clear beer.. idk if it works but I keep using it)
.5oz Hallertau @ 5 minutes (I wasn't planning on it, but with five minutes left I said, why not? and tossed the leftovers in...)
I ended up at 5.25 gallons of 1.054 which I figure to be around 89% efficiency (amiwrong?)
I pitched a packet of Fermentis US-05 dry yeast and let ferment at room temp...
Now that I think about it I haven't even checked on it since brewday... That was almost 3 weeks ago!
(also I dropped my cooking thermometer in the boil... and it's totally garbage now, ugh) but the good news is, now I have a reason to buy a Thermapen... so... much... want...
What else has been going on...? Keggle is welded. I just need to buy a few trim pieces for it and I'll be ready to double my brewing capacity... I plan on having the obvious ball valve and diptube for draining the kettle and also a combination thermometer and sightglass. I had two bungs welded in for this reason but to start I'll just set up the ball valve/diptube and plug the other one to add the therm/sight tube in the future "as resources allow"
Also, we had this Hurricane Irene thing come through. They hyped the hell out of it... "Power could be out for up to a week!" they said. Pfft, boy were they wrong! It was only out for six and a half days... truestory... Luckily I prepared to be without power or water for a while. I took all my buckets and filled them with water and left them in the bathtub (for... *ahem* flushing) I also cleaned and sanitized all my empty kegs (4) and filled with drinking water. This worked out pretty well... after a while they did end up carbonated even though I shut off the CO2 except when I was pouring... Luckily I was able to shower and charge my phone and kindle at work... Probs the best week of sleep I have gotten in a long time. So dark and quiet! Def getting a generator for the new place though... My wife did not enjoy roughing it nearly as much as I did.
What's coming up... I'ts almost fall, that means pumpkins and cider! Pumpkin ale came out great last year, not changing anything in my recipe except upscaling to ten gallons. That should be my next brew after the move. Unless I sneak in a quick cider without my wife noticing...Shh! Also doing a Beercan Chicken with one of my fav IPA's that happenes to come in a can... Baxter Brewing Company's Stowaway IPA. Super excited!
I guess that's it for tonight... my kindle is calling... Later.
So I did manage to find time to brew... I did a recipe posted by a HBT member... Cream of Three Crops Ale, the style is a cream ale, and the three crops would be the barley, corn, and rice used in the mash, hence the clever name. The word is that this recipe tends to impress BMC (Bud Miller Coors) drinkers and while this isn't really my style, I didn't really brew this one for myself. I'm planning on having it on tap as a "thanks for helping me move" kinda thing. Yeah I'm moving, The HRA homebrewery is gonna have a new location... NBD, same town, more room and storage for all brewing related activities though!
I made a few small tweaks to the original recipe. Biermuncher's recipe is for a ten gallon batch, and I am still doing 5 gallons for now (hint hint) When converting to a 5.5 gallon recipe (the extra 1/2 gallon ends up getting lost to the trub at the bottom of the fermentor when transferring to keg... the price of clear beer) I shifted around the grain ratios a little. I also used all Hallertau hops bc I like 'em...
My recipe ended up being something like this:
5.5gal AG
5.5lbs American 2 row
2.5lbs Flaked Maize
1lb Instant Rice
1lb Rice Hulls (you'll def need 'em)
152 degree mash for 90 minutes
double batch sparge (no mash out)
90 minute boil
1.5oz Hallertau @ 60 minutes
1 whirfloc tablet @ 20 minutes (supposed to help clear beer.. idk if it works but I keep using it)
.5oz Hallertau @ 5 minutes (I wasn't planning on it, but with five minutes left I said, why not? and tossed the leftovers in...)
I ended up at 5.25 gallons of 1.054 which I figure to be around 89% efficiency (amiwrong?)
I pitched a packet of Fermentis US-05 dry yeast and let ferment at room temp...
Now that I think about it I haven't even checked on it since brewday... That was almost 3 weeks ago!
(also I dropped my cooking thermometer in the boil... and it's totally garbage now, ugh) but the good news is, now I have a reason to buy a Thermapen... so... much... want...
What else has been going on...? Keggle is welded. I just need to buy a few trim pieces for it and I'll be ready to double my brewing capacity... I plan on having the obvious ball valve and diptube for draining the kettle and also a combination thermometer and sightglass. I had two bungs welded in for this reason but to start I'll just set up the ball valve/diptube and plug the other one to add the therm/sight tube in the future "as resources allow"
Also, we had this Hurricane Irene thing come through. They hyped the hell out of it... "Power could be out for up to a week!" they said. Pfft, boy were they wrong! It was only out for six and a half days... truestory... Luckily I prepared to be without power or water for a while. I took all my buckets and filled them with water and left them in the bathtub (for... *ahem* flushing) I also cleaned and sanitized all my empty kegs (4) and filled with drinking water. This worked out pretty well... after a while they did end up carbonated even though I shut off the CO2 except when I was pouring... Luckily I was able to shower and charge my phone and kindle at work... Probs the best week of sleep I have gotten in a long time. So dark and quiet! Def getting a generator for the new place though... My wife did not enjoy roughing it nearly as much as I did.
What's coming up... I'ts almost fall, that means pumpkins and cider! Pumpkin ale came out great last year, not changing anything in my recipe except upscaling to ten gallons. That should be my next brew after the move. Unless I sneak in a quick cider without my wife noticing...Shh! Also doing a Beercan Chicken with one of my fav IPA's that happenes to come in a can... Baxter Brewing Company's Stowaway IPA. Super excited!
I guess that's it for tonight... my kindle is calling... Later.
Saturday, August 27, 2011
Vacation (Beercation) Recap...
So... Part 2 of catching up on blogging laziness (I mean being too busy... totally meant being too busy... for realz... ugh)
Up in the lakes region in Maine every July the have this small town fair, Casco Days always the last weekend in July. It's a nice little wholesome thing and everybody in the family that has kids crowds into these two little cottages on the lake. We're talking twenty people crammed into four small bedrooms, air mattresses on the floor, kids underfoot, sharing one shower... it's pretty great.
Just to back up a bit, I had brewed two batches for this vacation. Ten gallons should be plenty for a week right? You would think so... I brewed my Fresh Citrus Witbier 2.0 and a Centennial heavy 60 Minute IPA. I had stressed about how to chill and serve two 5 gallon kegs without my kegerator. No money to build a jockey box right now... The plan was to stand the kegs up in a large cooler full of ice and use my CO2 setup and picnic taps to serve. At the last minute, I said screw it and packed up my whole kegerator and sent it up with my wife a day ahead of me. When I got up there Thursday night she had it plugged in and chilled. All I had to do was hook up the CO2 and put the faucets together and I was ready to serve just in time for the fireworks.

The only fireworks worth seeing every year. Best view from the dock and no traffic getting home after...
The basement of the cottage was the place to be (that's where the kegerator was)... After the young ones were in bed, super grown up fun times!

Beer Pong almost every night... in the basement, under the deck, up on the deck... it was like a full travel league. Also, don't worry... we were playing with water folks.
So I know you are wondering how long ten gallons of beer lasted. Tapped both kegs Thursday night around 9, I think the Wit kicked early afternoon on Saturday (less than 48 hours) and the IPA made it until Monday night. Next year... More. Kegs.
In addition to the homebrew, the other beer geek in the family brought up a huge selection of beers he had cellared... Thanks Carl! I totally made a list of them all and was going to write them all up, but... I forgot all my notes at the cottage. I think I can give each a line or two from memory... but all I have to go on is this pic.

Baxter Brewing Stowaway IPA: If you are a regular reader, you know I love this beer. See here...
Gritty McDuff's Red Claw Ale: A nice Red Ale from a local Maine brewery... malty and tasty as a Red Ale should be.
Sierra Nevada Summerfest: A nice hoppy Pilsner... great summer beer.
Pike Brewing's Old Bawdy: Amazing Barleywine. I don't remember the year, but it was nicely aged and mellow.
Harpoon's Smashed Blueberry: I was alone on this but I really liked it. I wasn't expecting something like a porter from a blueberry beer, but this one did it nicely. The chocolate and coffee flavors from the malt went really well with the blueberry.
Allagash's Odyssey: Big, roasty, oaky, dark wheat beer. I honestly love everything I've tried from this brewery out of Portland, ME. They do a lot of belgians and I am super partial to belgian beer.
Unibroue's La Fin Du Monde: Belgian Triple... one of my new favorite beers. I recently also found this in 12 ounce bottles which is total win.
Brasserie Dupont's Saison Dupont: I love love love Saison. And from what I've read this is the standard for the style. Unfortunately, this is the first time I had tried it. It was everything I hoped for. Dry but full bodied. Crisp and carbonated like champagne. Did I mention, love love love?
Unita's Tilted Smile: Imperial pilsner... is that really a style? My first time trying an Imperial Pilsner. Honestly, unless this is way out of the style, I gotta say I'm not a fan. This was a huge malt bomb without the hoppiness that I like in a standard pilsner.
Rogue Yellow Snow: A really really good IPA. A+!
Lagunitas' Hop Stoopid: Great big in your face 100+ IBU DIPA... awesome beer. I would expect no less from Lagunitas.
Dog Fish Head 120 Minute IPA: Re. dic. u. lous. My first time trying this if you disregard the taste I had when I first got into craft beer, before I had a taste for hoppy stuff. This was a 2009? so a lot of the hop profile must have been aged out. I would really like to try a fresh one.
Samuel Adams Triple Bock: This is the most vile "beer" I have ever tried. More like a liquor, uncarbonated... consistency and color of reduced soy sauce. It had stained the blue glass bottle opaque black. It was really the smell that got to me. Every time I went to take a sip, the smell would psych me out and I physically had trouble making myself try it. When I did finally hold my breath and take a sip, the taste wasn't as bad as the smell. Not a fan, just sayin...
Baxter Brewing's Pamola Pale Ale: Another great beer from Baxter, this and the Stowaway make up the young brewery's entire product line. This is a great example of the style, just make sure you try it before the IPA or your palate will be screwed.
In the midst of all this great beer I got to do a lot of other great vacation stuff. Spent some great family time with the wife and kids. Wiffle ball, beach, lake, boat rides, wakeboarding, tubing, disc golfing (where I got my first Ace (hole in one) in my 4 year "career") I also got to check out Baxter Brewing's brewery... it took three tries, but I got there... I picked up a sweet T-shirt and a case of the IPA to take back to CT and ended up giving most of it away to my IPA loving friends. i totally meant to do a Beer Can Chicken with one, but I forgot and drank the last one (sadface) I'm planning on going up for the Maine Lakes Region Brew Fest this month. It should be a great time and I'll def be picking up some Baxter beer...
That's it for today, stay tuned for part three of my shameful catch up... Big things are brewing for me (sry for the awful pun, but that's how I roll) I'm not ready to make any anouncement yet until things are finalized later this week. Thanks for sticking with me... Later.
Wednesday, August 24, 2011
Busy Life is Busy... Also, Keg Jumping...
So... been awhile, amirite??
Don't really know where to start. I'll probz be breaking this up into a few quick posts to keep your (and my own) attention. I'm so far behind at this point, I feel like I should apologize. So... Sry... my bad... Life is super busy right now and brewing has taken a back seat, also blogging has taken the way way back seat, like in my mom's '87 Caprice Classic station wagon when I was growing up... with the fold out backseat that faced backwards, and when any friends rode back there with me they guaranteed, 100%, got carsick and barfed... just like that.
Anyway... where did I leave off? prevacation? right. So I keg jumped the two kegs I was bringing to Maine. When you bottle homebrew, you always end up with a little bit of sediment on the bottom of each bottle. If you are patient the sediment tightens up and you can pour the beer off without really disturbing it. The same is true when kegging. Sediment falls to the bottom of the keg, after the first few pours clears the sediment around the pickup tube you get clear beer... unless the keg gets moved (like say by a four hour car ride to Maine) and the sediment stirs back up. So, by keg jumping I basically moved the beer from one keg to another and left the sediment behind.


Don't really know where to start. I'll probz be breaking this up into a few quick posts to keep your (and my own) attention. I'm so far behind at this point, I feel like I should apologize. So... Sry... my bad... Life is super busy right now and brewing has taken a back seat, also blogging has taken the way way back seat, like in my mom's '87 Caprice Classic station wagon when I was growing up... with the fold out backseat that faced backwards, and when any friends rode back there with me they guaranteed, 100%, got carsick and barfed... just like that.
Anyway... where did I leave off? prevacation? right. So I keg jumped the two kegs I was bringing to Maine. When you bottle homebrew, you always end up with a little bit of sediment on the bottom of each bottle. If you are patient the sediment tightens up and you can pour the beer off without really disturbing it. The same is true when kegging. Sediment falls to the bottom of the keg, after the first few pours clears the sediment around the pickup tube you get clear beer... unless the keg gets moved (like say by a four hour car ride to Maine) and the sediment stirs back up. So, by keg jumping I basically moved the beer from one keg to another and left the sediment behind.

So I built a keg jumping line. Simple, all it is is a length of beer line with a liquid disconnect on either end.

The process of keg jumping is also simple. Let kegs chill and settle for a week or so in kegerator, tap and pour a few pints to get clear beer, hook up jumping line to the settled keg and a clean, sanitized and empty keg. With serving pressure on the full keg, lift the pressure relief on the empty keg allowing the beer to flow. When the full keg is empty and the empty keg is full, that's it... keg jumped.
Repeat on the second keg, load kegs and kegerator into the van and off to Maine I went. I had originally planned on using a cooler full of ice and picnic taps to serve, but I was able to bring the whole kegerator setup to the cottage... totally pimp.
So any guesses on how long 10 gallons of homebrew lasted in a cottage full of people?? Think on it... I'll let you know next time when I tell you all about vacation... total cliffhanger! Later...
Subscribe to:
Posts (Atom)