Not much brewing here... ugh promised myself I would never use that... totally ashamed.
Quick status update: Had family party and was pretty successful. As it relates to brewing, Inefficient Witbier keg is almost kicked and the girls (and a few of the guys (including me)) liked the cider. Fortunately I think I got most of the raisin skins out in the sample glasses I had, so I think I saved myself the embarrassment of having to explain what the chunks were... Witbier 2.0 is still in the fermentor. I plan on racking soon, honestly kinda forgotten about it...
So what's new? Planning my next batch... brand new recipe. French Saison... Borrowed the ingredients and ratios from a recipe posted on the forums... HBT How Rye Am I (Rye Saison), just to give full credit. Changing batch size to fit my system, so exact ratios are not the same. The fun thing about this style is the yeast. Normally ale yeasts like to ferment at around 70 degrees and off flavors start to show up if you go much higher than 75. This obviously presents a challenge in the summer if you don't take measures to control the fermentation temps. But this yeast (Wyeast 3711 French Saison)... I haven't used it yet, this is my first attempt at the style ...this yeast likes it hot (scandal!) you actually get the distinctive flavors of the style by pushing fermentation temps over 80.. even up to 90!!! It's warm in my house but not that warm... I have a trick I use in the winter to keep my fermentation temps up and I'll use that to crank the temps up for this batch. Stay tuned for that!
So... the way I figured out my ingredients for this batch was with brewing software. There are a lot of options for software. None of it is really expensive, but I am pretty cheap (read I have to explain all beer related purchases to the wife). I use a free website that does not have all the bells and whistles. Still, it's good enough. I know my typical efficiency and boil volumes... Knowing the ratios, OG (original gravity), IBU (hop bitterness), and SRM (color) of the original recipe, I can come close enough to replicating.
So I have my ingredient list... I contacted my LHBS guy on FB (total inside connection!) and asked about the availability of everything. Assuming everything is on hand, I plan on picking up ingredients Thursday to make the yeast starter Thursday night, so that I am ready to brew for Saturday afternoon or Sunday morning. Totally getting excited now... have been wanting to brew this style for six months but have been waitning on warm weather. See you this weekend for an update?? later...
Tuesday, May 31, 2011
Thursday, May 26, 2011
Quick Self Review of Inefficient Witbier and Summer Cider

A little preview of the wit... tastes great (!) but needs a little more carbonation. Spices and orange are right out front but well balanced with each other. Pretty psyched about the color, idk if the pic does it justice, it could be just a shade paler but that's probs bc of the pound of extract I added... So I measured 1.040 before fermentation. I think this reading was a little shy of actual. I got poor efficiency (obv) and got 1.038. Then I added a pound of dry extract and another half gallon of water. My software isn't great (i.e. free) but I figure it should be more like 1.045(?) When adding extract it is really hard to mix well enough to get an accurate reading. If my software is right the abv should around 4.5% which is accurate to the style? This is a recipe that I think I will be working on for a while. But since it is one of my favs, I'm pretty determined.
Trying to carb this one up quick for the party, so I'm not really mathing it out, just winging it. After force carbing at 30psi for prox 48 hours as it chilled, I relieved pressure, turned the regulator down to 10psi (my normal serving pressure) and poured. I would like it a little more carbed and on the higher end of what I usually serve at. So.. I cranked up the serving pressure to 13psi and leaving it there. Because I have a single regulator setup (both kegs see the same pressure), this will also carb the cider a little but more. But that's ok, it's a cider!
Right! The cider...! Let me finish this beer then I'll pour a cider...

I heart cider... totally... Before I started brewing I hadn't tried a lot of ciders. CiderJack (geez, what was I 16?? I mean... nm) Woodchuck, Harpoon... I think that's it. But since I started brewing, I have done probably 5(?) cider batches.. it's so easy!
This cider is exactly what I wanted it to be. Not full autumn, very light and refreshing... perfect for a muggy New England summer night. Also at 7-8%-ish abv, it's got a little bit behind it. Still a little sweet, probably the sweetest cider I have made. Again I'm cranking up the carbonation on this too. I think the high carb will make it a little more crisp and that much more thirst quenching. Did I really just say thirst quenching?? lame...
Unfortunately a few of the raisin skins made it through the siphon... so embarrassing... In the future I think I'll try and contain the raisins in a hop bag or something... nbd.
Pretty happy with both of these, after they carb up a little more and things settle out a little more I'll be happy to serve them to company... I think. Anyway... that's it for tonight. later...
Tuesday, May 24, 2011
Keg Cleaning and Kegging Witbier (Super Exciting!! (not rly))
What up? Tonight I tapped the cider to check carbonation... okok I caved to temptation... no judge. Carbonation is good, flavor is mild and very refreshing. Super easy to drink for an 8% abv-ish bev... great summer drink. Still pretty sweet, so the girls will probs dig it...
Goals tonight were to clean the keg and tap from the SMaSHed Pils. Then sanitize and keg the Inefficient Witbier. Before I get to the wit, I thought I could give a quick run through on how I clean the kegerator. Mundane, I know... but maybs helpful?
Biggest thing to keep in mind, the longer things get left sitting, the grosser they get... so I try to clean as soon as possible after a keg kicks.
First I take the freshly empty keg, relieve pressure, and open. I put a little water in, swirl, and pour out sludge. Then I add a scoop of Oxyclean free (tip learned from HBT) fill with hot water, put lid back on, and roll the keg around on the floor to mix. Then I hook keg of warm oxyclean up to gas and the beer line of the tap I want to clean, I run the oxyclean through the line and tap 'til it runs clear. Disconnect that keg and put aside until next time.
Take another keg from the closet that has been soaking in oxyclean since last time. Disassemble keg, tap, and beer line disconnect. Put all those parts in an oxyclean bath for an hour or so.

Tap, disconnect, and keg parts sitting in Oxyclean bath...
Empty keg of oxyclean and rinse thoroughly with water. Rinse all parts and reassemble keg and kegerator. Fill clean keg with water, hook up and run plenty of water through tap. Disconnect keg and drain water from beer line by opening the tap and pressing the pin in on the disconnect. If I was going to leave the tap empty for a while, this is how I would leave it. Then take the keg, still filled with water, open, add sanitizer, close up and roll around on floor. After draining sanitizer, it's ready to go...
Tedious? kinda... but bottling is 50x more worse. Also, I will confess... I have... in the past... switched out kegs without cleaning the tap. (no judge) Phew... glad I got that off my chest. I feel so liberated! Srsly though... I really don't see the need to clean the tap and lines every time a keg is changed. I'm thinking bars rarely do... (correct me if I'm wrong) Obv if the tap sits with old beer and sludge in the lines for weeks, it needs to be cleaned...
On to the wit...

Gravity reading is 1.010 3 days in a row... def done. Pic does not do the color justice. Paler than it looks. This is where White Ale (witbier) gets it's name. Also, 1.040 OG (original gravity) to 1.010 FG (final gravity) works out to just under 4% abv... so this isn't a killer beer, but I'm thinking it will be just fine for the crowd I will be serving to.

Yummy?? Smells better than it looks, you'll have to take my word. I smell the orange and spice... a little belgian funk (very mild). Also, under the layer of scum (krausen) on top, the beer is very clean. When you siphon, you are taking the beer from underneath the krausen so this doesn't end up in the keg.

Looking into the bucket as I am siphoning.
So... filled keg, purged with co2, sealed, tossed in kegerator, and put on 30psi to force carbonate. Also, can I point out that I brewed this on the 14th, today is the 24th and this will be carbed and ready to drink in probs 2 more days. That is grain to glass in 12 days for those counting (anybody?) That is pretty awesome and the reason I like to brew this style often.
So... 5 gallons each of Cider and Witbier on tap for family party on Memorial day? Sure! That's it for tonight... Later.
So... 5 gallons each of Cider and Witbier on tap for family party on Memorial day? Sure! That's it for tonight... Later.
Sunday, May 22, 2011
Witbier 2.0... This time, it's personal??
Thinking I might recommend my last two posts Total Zen to Total Fail in 3.2 Seconds and Witbier 2.0 as prerequisite reading before this one.
It's rare that I brew two weekends in a row... was pretty great. The house was full empty, total zen mode. I am noticing that even after the 20(?) batches I have brewed, things are still getting easier. I am getting my process down well enough that I have time to chillax (lulz) between stages. Also, I can keep cleaning as I go, so when I am done, I only have 15 minutes of cleaning left... which is awesome bc I am usually wiped at that point.
For this batch I tried to do everything the same as last time. So the only change would be my recipe and I could see how much that affected my efficiency. With my system and process, it's hard to exactly reproduce everything though. Didn't take a lot of pics because everything was mostly the same as the last batch. Probably easiest to just discuss the things that were different this time.
Rice Hulls... I talked about them last time. This time I tried just using a half pound instead of a full pound. It worked fine... so that's cool. One small thing I can stretch a little further to make my batches cheaper (even though rice hulls are super cheap) I had to ask for an explanation the first time I used them so I figured I would take some pics and go over what I do real quick...

These are the dry Rice Hulls in the bag

I rinse them in a pot with warm water. To me this serves a few purposes... Rinses off any debris or rice flavor/odor (the water from rinsing always smells like rice). Pre-soaking keeps them from sucking up my strike water, that way when I calculate how much water to mash with, I don't have to take them into account. Also I like to use warm water, in my head this preheats a tiny bit of the grain helping me hit my mash temp??

After rinsing and soaking I strain and toss (toss like salad to evenly distribute) into the grain. Also, like to put a few handfuls in the bottom of the mash tun around the manifold. Idk if this is necessary, but it makes sense to me?
So... strike water. I like to mash at 1.125 qt/lb. My grain bill was 9.5 lbs so I measured out 10.75 qts and heated. When I mashed, I noticed a few things... My mash looked looser than I have ever seen it. Wondering if I measured wrong? A thin (more water) mash, I am told, could cost a few efficiency points. Also, after checking my notes from the last batch, I realized that I only used 10.25 qts for my mash.... Idk how much difference any of that would make though.
Mash... I mashed at 154 this time, two degrees higher than last time. I overshot a little, but because my mash already looked thin to me, I didn't want to add cold water to try and adjust. So I just let it ride. mashed for a long hour, no rush. Also I did an Iodine test to confirm full conversion.

Iodine test... A few drops of first runnings in a white saucer and a drop of Iodine (I used my sanitizer concentrate) If conversion was not complete the Iodine would change purple or black in the presence of the complex starches. If all the starches have broken down to fermentable sugars, there is no change in color.

Just a pic of the last of my sparge going into the kettle. I got nervous that I had over calculated my water and was going to overfill the kettle. So right after taking this pic, I shut it off, and started draining into another pot. I got a full cup into the new pot and it stopped anyway... of course. (no emoticons blogger?? I need a rolling eyes smiley here)

Oh! So... every brewday I forget to take a pic of my wort chiller for you. This time I fully forgot again. But, after about 5 minutes in the boil I remembered, pulled it back out and took a pic. I totally burned my hand on the hot copper to show you a pic of my ugly junk (that sounds terrible) It's ugly but it does the job.

If you look close you can see the spices and orange peel floating on top here. Trying to keep things the same, I forgot the tablespoon of flour at flame out... again. The wit style is supposed to be cloudy. The flour is just a little trick to make sure it stays cloudy no matter what. So we'll see what happens there.

My yeast starter was fully active when pitching. I wish I could have given it a little more time (I kinda started it at the last possible second) I had a little lag for fermentation to start. It was just starting to bubble (I know, I know HBT peeps... not a good indicator) the next morning... I hooked up a blowoff tube just in case it decides to go full nuts like the last one did

Here are the two fermentors side by side, one week apart to the day.
Results... I took a preboil gravity reading 1.036 at 7.25 (ish) gallons. I'm not sure on the relevance but I have been asked about this on the forums a few times, so I figured I could at least be prepared with an answer this time. I boiled off more than I expected to in the 90 minute boil (remember 90 minutes whenever I use pilsner) so I topped up about a quart to get to 5.5 gallons and I measured gravity at 1.047. That puts me at 71% efficiency? which is ok... not what I was shooting for but ok. I have a few more questions that I will keep to myself until I answer them... I will brew again and see what happens. Probs not next batch (thinking I'll get sick of wit if I do 3 batches in a row) So... Victory?? I guess... not as decisive as I was hoping but it's progress..
Also, sidenote... The SMaSHed Pils keg kicked tonight. :( (Also, shhh on the fact that it was only two weeks) But the timing is actually good bc I can get the first wit into the kegerator to carb for next weekend (total family party for three year old birthday...) Quick cider has been sitting a week carbing. Planning on leaving alone till party. Probably quick cleaning of the Pils keg and tap then kegging the wit tomorrow night. Maybs see ya then... Getting to be hard to not be repetitive here... thinking blog posts will be getting shorter? Anyways... Later.
Saturday, May 21, 2011
Witbier 2.0
A little review... I brewed my Witbier recipe last Saturday afternoon. This is one of the first recipes I started from scratch, rather than borrowing and modifying a recipe someone else had posted. I have brewed this recipe three times. The first time I got 83% efficiency (really good), then the second and third times I got less than 50% efficiency (terrible).
I think I have it figured out now... (this may be total boring jargon to non-brewers, but bear with me) When designing the recipe, I was reading a wiki article on the Wit style. The article gave general outlines ratios of grains to use. It suggested a certain percentage of unmalted wheat, but unmalted wheat is difficult to handle in the mash. The wiki then stated that if you should use malted wheat instead, a larger ratio is necessary to get the same flavor. I misread, and used the larger ratio of unmalted wheat. So the problem was my recipe... fail.
Sidenote... Malting is when the grains (barley, wheat) are wetted, allowed to sprout, and then dried. This creates a chemical change to the carbohydrates in the grain and starts to convert them into simpler sugars.
In the mash, we use the enzymes that exist in malted barley to further break down the sugars and carbohydrates contained in the grain, into simple sugars that yeast can then eat and turn into alcohol. In unmalted wheat, these sugars are still locked up as complex carbs, making conversion more difficult. This is why I got poor efficiency on my last two batches. The reason I got good efficiency the first time is kind of a mystery, but I suspect I accidentally got malted instead of unmalted wheat. So I probably screwed up and did it right the first time...
It is possible with a few more steps and procedures to release the sugars, things like decoctions and cereal mashes. I won't go into the details of these, bc I have no experience...
So... to test my theory of what went wrong I am brewing again today. Back to back Wits... I had two choices, keep my recipe the same and get fancy trying new techniques, or change my recipe to fit my skill level. Since the recipe I was using wasn't correct for the style anyway, I took the easy route and switched most of the unmalted wheat to malted wheat. I know, I know... total wuss move, totally ashamed... I may play with advanced stuff like decoctions in the future, but I don't think I'm there yet and aside from this one recipe, I am having really good results. Also, right now I would prefer to focus on my recipes anyway.

Details of this brewday... same recipe, except for the change in wheat. I did not buy yeast this time. I figured my first batch would be done by today. I figured I would rack to a keg, and pour the new wort right into the same "dirty" (totally sanitary) bucket with all the yeast still sitting in the bottom. The old yeast would wake right up and go full nuts on the new wort. ...but, when I tested the beer last night, it's almost done... but I don't want to rack it yet. So, I tried something new I haven't done before. I actually haven't heard much of people doing it (probs totally do)... I made a starter just like I showed last time, but instead of using a smack pack, I harvested yeast from my active batch in the fermentor. I used a dedicated, sanitized turkey baster to pull the sample, making sure to get lots of the foamy krausen on top and some of the actual beer (shoulda taken pics, sry) let that culture overnight, hopefully those yeasties are multiplying like crazy right now...crap, just realized I forgot to check on it before leaving for work this AM...I mean...what?? I'm totally not blogging at work. (okok, I am... but it's my second, PT job. Zamboni driver, lot's of down time... no judge.)
Check back tonight or tomorrow for more hot blogging action... I will fully be here, talking about my brewday. later...
I think I have it figured out now... (this may be total boring jargon to non-brewers, but bear with me) When designing the recipe, I was reading a wiki article on the Wit style. The article gave general outlines ratios of grains to use. It suggested a certain percentage of unmalted wheat, but unmalted wheat is difficult to handle in the mash. The wiki then stated that if you should use malted wheat instead, a larger ratio is necessary to get the same flavor. I misread, and used the larger ratio of unmalted wheat. So the problem was my recipe... fail.
Sidenote... Malting is when the grains (barley, wheat) are wetted, allowed to sprout, and then dried. This creates a chemical change to the carbohydrates in the grain and starts to convert them into simpler sugars.
In the mash, we use the enzymes that exist in malted barley to further break down the sugars and carbohydrates contained in the grain, into simple sugars that yeast can then eat and turn into alcohol. In unmalted wheat, these sugars are still locked up as complex carbs, making conversion more difficult. This is why I got poor efficiency on my last two batches. The reason I got good efficiency the first time is kind of a mystery, but I suspect I accidentally got malted instead of unmalted wheat. So I probably screwed up and did it right the first time...
It is possible with a few more steps and procedures to release the sugars, things like decoctions and cereal mashes. I won't go into the details of these, bc I have no experience...
So... to test my theory of what went wrong I am brewing again today. Back to back Wits... I had two choices, keep my recipe the same and get fancy trying new techniques, or change my recipe to fit my skill level. Since the recipe I was using wasn't correct for the style anyway, I took the easy route and switched most of the unmalted wheat to malted wheat. I know, I know... total wuss move, totally ashamed... I may play with advanced stuff like decoctions in the future, but I don't think I'm there yet and aside from this one recipe, I am having really good results. Also, right now I would prefer to focus on my recipes anyway.

Check back tonight or tomorrow for more hot blogging action... I will fully be here, talking about my brewday. later...
Saturday, May 14, 2011
Total Zen to Total Fail in 3.2 Seconds
Brewday!!!!1!!!one!... I love brewday. Totally drowns out the constant mumbling in my brain. I can't worry, dwell, obs, or stress when I am thinking about strike temps, mash volumes, evaporation rates, etc... I purposefully brew the hard way for this reason. If brewing was too easy, I would be able to think too much and that defeats the point. It is teh supergreat. Right now I have an empty house, brew kettle is heating up to boil, and I am the most relaxed... life is kinda good.
Today I'm brewing a Belgian Witbier. This is a style I do over and over because it is really quick, easy to drink, and most people like it (even non-beer nerds)... This style beer is better the fresher it is, and the yeast I use is insanely fast. With kegging, it is ready to drink at one week. Most beers are a month minimum. Even with bottling, this beer was insanely fast. With this yeast, bottles always carbed up for me within a week when three weeks is the norm. I am planning this beer to be on tap for my son's 3rd birthday party (we have a huge family, family birthday parties typically run into 40ish people) Party is either going to be Memorial day weekend or the the weekend after. Either way, plenty of time.
So... The 'ticulars of this beer. Pilsner malt... anytime I use pilsner malt I do a 90 minute boil instead of one hour. The reason we boil beer is to sanitize, extract flavor and bitterness from the hops, and to boil off impurities. Pilsner malt is high in a particular impurity called DMS (idk what it stands for and don't feel like googling... someone once told me, Never. Google. Anything. lol) and DMS can give off flavors similar to creamed corn or popcorn... not what I am going for. So an extra long boil will ensure that all of that junk evaporates away. Lots of wheat... this recipe is 60-ish% wheat. Wheat is kinda tough to mash, it turns to glue as it soaks then clogs up the works and does not like to drain when sparging. Whenever I do this recipe I use rice hulls rice hulls are exactly what they sound like. The hulls that are removed from rice grains. They add no flavor, color, or sugars to the beer. They just keep things loose and flowing in the mash tun. Low hops... this style isn't about the hops. It's about a strong wheat flavor, good yeast, and other spices (I'll get to that) I do still use a 60 minute hop addition to balance sweet/bitter and a small 5 minute addition for aroma. Spices... Coriander, cracked and added to the end of the boil. Also, bitter orange peel added at the same time. Instead of bitter orange peel I have played around with a lot of citrus options... zest of orange, grapefruit, lime... blood orange peel, flesh, juice (love blood oranges)... but today keeping it simple and using dried bitter orange peel. These spices give the expected flavor profile for the style.
This all seems kinda dry... how about some pics?

Taking the new 10 gallon Mash Tun for a spin today... Waiting on boil right now to figure out efficiency... Efficiency is the measure of the amount of sugar that is pulled from the grains vs. the amount of sugar the grains actually hold. Typically expressed in a percentage. 70% efficiency is average for this process (I think) and I usually get about 83% from my calculations.

Nailed my strike temp, 152... unfortunately all the extra head space in the bigger tun caused me to lose 5 degrees over the course of the hour mash. Not used to losing more than a single degree. Wondering if I should go back to the 5 gallon tun until I have everything together for 10 gallon batches.

This is a pic of either draining first runnings or sparge, idk which, they both look the same.

Full kettle before boil. Really like the color...

Can kinda see I came really close to boiling over due to blogging while coming to a boil...
Need to break here to sanitize some stuff and get my crap together for post boil activities (also need beer).
Oh hey! I'm back... Totally chill... so quiet right now (no kids), sitting outside , just chirping birds, light sprinkling rain on tin patio roof... total zen. What was I blogging about? Oh... beer!

Also this! Have I mentioned the SMaSHed Pils? I love this beer. Really nice balance, somewhere between a pale ale and IPA but pilsnery, citrusy hops, mild lingering bitterness. I have to bottle some of this before it is gone... Also, this has to last me until the birthday party so that I leave the other batches alone, keep your fingers crossed... idk what will happen!!
So... I got stuff sanitized, ferementor rinsed, boil is done, all hops and spices added... wort is chilling... smells amazing as usual, wish I could share the smell with you.

Wort chilling, notice how much has boiled off. Also, I meant to get a pic of my wort chiller before putting in, but I spaced again, sry. Next time for sure...

ok... zen feeling gone... took gravity reading. 1.038 wth!?! that puts me at 40% efficiency? wth?!! ugh ugh ugh! Triple checked gravity reading... checked calibration of hydrometer... wth?! drastic measures... boiling a pound of dry light extract right now, to add and boost gravity. Hoping to save this. This is the second time with this recipe that I have gotten low efficiency... I don't get it. crap!
okay okay, deep breath... so, results. I boiled a pound of DME in 2 qts water and added to fermentor. Only brought gravity up to 1.040. Also, as a bonus, I stirred that into fermentor with my thief (thingy that I take gravity samples with) and managed to break the tip off. ugh.
This recipe has failed me twice. I'm thinking it's not my method, bc I have brewed other things since and still hit my high efficiency numbers. Posting recipe to reach out to more experienced brewers...
3 lbs belgian pils
1 lb 6 row
5 lbs unmalted wheat
1/2 lb quick oats
1 lb rice hulls
mashed 1.125 qt/lb (normal for me) not counting rice hulls. (pre-soaked rice hulls) mashed at 152 for an hour lost 5 degrees. double batch sparge 2.5 then 3 gallons at 170. 7ish gallons into brew kettle, 1.5 gallons boiled off in 90 minutes. 5.5 gallons into fermentor
was expecting 1.055 with my normal efficiency, ended up at 1.038... maybe it's the all the unmalted wheat? do I need a longer mash? I don't mind making mistakes if I can learn from them, but I have no idea what I am doing wrong...
Also side note, cider is not done yet. Sitting at 1.016. I'm going to push it till tomorrow night and then keg. I probs won't have time during the week. Ayways... did I mention ugh? Also, Later...
Edit- sorry forgot one more pic...

Pitching my liquid yeast starter into the fermentor....
Gettin' Deconstructed
From the Sam Adams website, "Samuel Adams® Latitude 48 IPA is a unique IPA brewed with a select blend of hops from top German, English, and American growing regions all located close to the 48th latitude within the “hop belt” of the Northern Hemisphere. The combination of hops in this beer creates a distinctive but not overpowering hop character. The beer is dry hopped with Ahtanum, Simcoe®*, and East Kent Goldings hops for a powerful citrus and earthy aroma. The hop character is balanced by a slight sweetness and full body from the malt blend"
Recently SA did a limited release 12 pack called Latitude 48 Deconstructed. The 12 pack comes with 6 different beers. All 6 beers have the same malt profile, but different hops. 5 of the beers have the individual hops that are used in Latitude 48 and the sixth is the original IPA.
Sounds boring? Well to a total beer nerd, homebrewer this might be the coolest thing released by a commercial brewery since... idk... the Miller Vortex Bottle (total joke) But srs, how often do we get the opportunity to do a 6-way side by side tasting of individual ingredients? This is the same idea as the SMaSH beers i talked about in my SMaSHed Pils post. I would have to brew 5 separate batches to be able to do this myself... so that's why I am totally excited about this.

So I am a terrible taster... I like what I like but describing it is really hard. I had to bring in backup, my buddy came over to drink beer while the girls went out for the night. Total quality bro time... Original plan (greatest plan) was to each drink all six beers, but since we both had to get up early for work, we wussed out and split them.
We tried to act all fancy, cleansing our palettes with saltines, taking extensive notes, but in the end we got sick of sad crackers and the notes got to be full garbage. So it devolved into just drinking beer.
So... down to (srs) business. The five hops of Latitude 48 are: Zues, Simcoe, Ahtanum, Kent Goldings, and Hallertau Mittelfreuh. My garbage notes are a garbage compilation of my and my buddy Dan's garbage conversations while tasting not garbage beer... We tasted in order (length of hop name, shortest to longest (totally logical)) Posting the notes here mostly for my own future reference.
Zeus: Smelled citrus aroma. had mild bitterness. flavor was very different from aroma, earthy, woodsy, maybe even a little smokey(?) flavor
Simcoe: Very light bittering, def citrus, very distinctive flavor, all I can think of is DFH 60 minute (which I total <3 btw...) Very smooth finish with no lingering bitterness
Ahtanum: Very little aroma, like none, like I put my nose so close and sniffed so hard I fully snorted beer up both nostrils, lulz... mild flavor, earthy, had a decent bittering bite to it.
Kent Goldings: Earthy, piney, we thought maybe minerally... like iron (irony?, ironic?) had a lasting bitterness the others didn't
Hallertau Mittelefreuh: could only smell the malt in the aroma, very mild hop in flavor and bitterness (which makes sense as this is a traditional hop used in german lagers) maybe a little piney?
Anyway... sorry to put you through all that... it was fun tasting though, felt so fancy!
Also, today is brewday! As soon as I get out of work (nm that I am blogging at work, shh!), maybs grab a quick, twenty minute nap, then it's on like donkey kong (no idea what that even means...) later
Friday, May 13, 2011
Making a Starter (Brewday Prep)
Brewday Saturday! Brewing up a Belgian Witbier (aka Belgian Wit, Belgian White, White Ale)... A hazy, light colored wheat beer with a belgian yeast character. Think Blue Moon (but more authentic)


Some advice I picked up on the message boards from the guy who runs Austin Homebrew Supply... With a beer style that focuses on the malt profile, use the best malt. For a style that focuses on the hop profile, use the best hops. And for a style that depends on the yeast, use the best yeast.
For a Wit, yeast is key... I have shown how I use dry yeast (which is totally fine for some styles) but here, I am using a liquid yeast which requires a little more work.

The brand of liquid yeast I always use comes in a pouch called a smack pack. It has a little pouch of yeast nutrient and food inside that you break open by smacking like an ice pack. Once smacked, the yeast wake up and eat, making the pack swell up. In the pic I already smacked and left sitting out for three(?) hours.
The manufacturer (Wyeast) says that this is plenty of yeast to start a 5 gallon batch that is up to 1.060 original gravity. But, the general consensus on the interwebs is that you should always make a starter with liquid yeast. I threw a starter together last night while cooking dinner. total multitasker ;)...
What's a starter?? Basically a yeast culture to increase the cell count and prove that the yeast is alive and well. The more yeast I use to start the beer Saturday, the less stressed the yeast will be and the quicker it will take off. So... pretty easy, all I do is make a super small (2 cups) batch of beer using dry malt extract, aerate, add liquid yeast, and keep aerated. When it is all feremented, the yeast will settle at the bottom.

This is dry malt extract (I know what it looks like) 3/4 cups extract and 2 cups water

Bring to a boil, watch closely... it can boilover easy!

Boil for 10 minutes (ish) just need to kill off any bad guys hanging out... Then cool it off. I fill the sink with cold water, put the pot in and swirl around till cool. Be careful not to splash gross sink water into wort.

After sanitizing my super cool frosted Magic Hat growler (bought at the brewery in Burlington, VT... full of amazing Encore IPA, way too cool for school...), I pour the cooled wort in.
Swirl around a bunch to aerate, yeast need oxygen to multiply.

Open yeast pouch and pour in liquid yeasties... then swirl again...

When making beer, the goal is to keep anything from getting in the fermentor. Here I want to keep adding oxygen to keep the yeast multiplying, so it has to be able to breathe. To seal, instead of using an airlock, I loosely cover in sanitized tinfoil
I keep it aerated by swirling the growler every time I think of it, or whenever I walk by it... As a future project, I am going to build a stirplate, this will constantly mix and aerate the starter with a super cool tornado vortex of beerness...

24 hours later, yeast have multiplied like crazy and it is starting to settle. See the light band on the bottom of the growler? That is solid yeast, also the milky looking beer has a lot of yeast still in suspension. When I brew Saturday, I can either pour out the clear beer sitting on top, or just swirl the whole thing up and pour in.

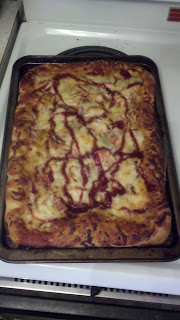
Also this. BBQ chicken pizza I made for dinner while doing the starter... grilled chicken, bbq sauce, red onions and gorgonzola cheese... zomg
So... brewday Saturday... maybs blog sat night, maybs Sunday. Tonight I'm tasting the SA Lat 48 Deconstructed 12pack. Hopefully plan on posting my garbage tasting notes too. Later...
Wednesday, May 11, 2011
Mini Update? (shrug)
oh hey... mini update. Drinking SMaSHed Pils tonight! Carbonation changed it a bit from the sample I took before kegging. I'll do a write up at my next full posting.
Also, planning next brew day for Saturday afternoon. Going to do the quick witbier... Grain to glass in just over a week! (you'll see..)
Also also, will be kegging the cider soon. Tested again tonight, sitting at 1.022 That's down 12 points in three days. If it keeps going at the same rate it should be where I want it on Saturday. So, thinking it will be a busy brew day...
Also also also, picked up a 12 pack of Sam Adams Latitude 48 Deconstructed. Psyched for this. 2 bottles of one of my fav IPAs and 2 bottles each of 5 single hop IPAs (the 5 hops make up the profile of Latitude 48)... Planning tasting for Friday night. I'll take notes, if my notes aren't complete garbage, I'll try to do a write up.
That's it tonight, tomorrow is another day! Later...
Sunday, May 8, 2011
Updates and a Look at my Kegerator
First... A few quick updates...


I am not overly excited by the clarity, because I know that as soon as I chill it, it will haze up. Half hour in freezer:

This is chill haze. As I understand it, the proteins from the grains that are floating around, invisible at room temp, coagulate (?) at chilled temps and become visible causing the haziness. In my experience, if it sits at serving temps for a few weeks this will eventually settle out and clear again. This doesn't happen in commercial beers because most commercial breweries filter their beers.
So... SMaSHed Pils smells and tastes amazing... Compared to the IPA style it does not quite fit... compare the color to the Latitude 48. The Pils is obviously lighter in color. Bitterness is not as present in the SMaSHed Pils. The flavor profile of the hop is nice but it does not have the bite an IPA usually does. The Aurora hops do not have huge bittering strength. The flavor profile is dominated by the hops. Lots of citrus. I had said I thought maybe I tasted apricot, but after hearing the LHBS (Local Home Brew Store) guy describe it as tangerine, that's totally what it is. I'm really excited about this beer. so I am force carbing to hurry it up.
Sidenote: Someday I hope I will remember to either take off my socks or put on shoes before cleaning and sanitizing in the kitchen... Wet. Socks. Suck.
An IRL, non-brewer friend had asked me about my kegerator. So while cleaning my taps and kegging the SMaSHed Pils, I snapped a few pics and figured I would do a quick description of how it works... I have said several times, bottling is the worst... Not trying to scare anyone away from it, but even though I loved brewing, I hated bottling (so much) The solution was kegging. So I needed to build a kegerator. Some people use a chest freezer and control the temp so it is fridge temp with a different thermostatI. More work and takes up more space but you can fit way more kegs and taps. (I have seen some on the forums with twelve different taps!) To save space, I went with a kegerator with two taps. I built this from a new, dorm sized, fridge. I got the idea and plans from the Homebrewtalk.com forums...


10 Gallon Mash Tun... I brought the manifold I built to work. I added the slots to the bottom of all the pipes. The first time I built the manifold, I used a hacksaw to make the slots. This made a huge mess with the cpvc shavings inside the pipes and it was a huge pain to clean up with a file. This time I used a cut off wheel in an angle grinder. It made nice clean cuts with very little leftover shavings inside the pipes. The new cuts are a little wider as you can see in the pic... I am a little worried that the higher flow rate will affect my efficiency but we will see..

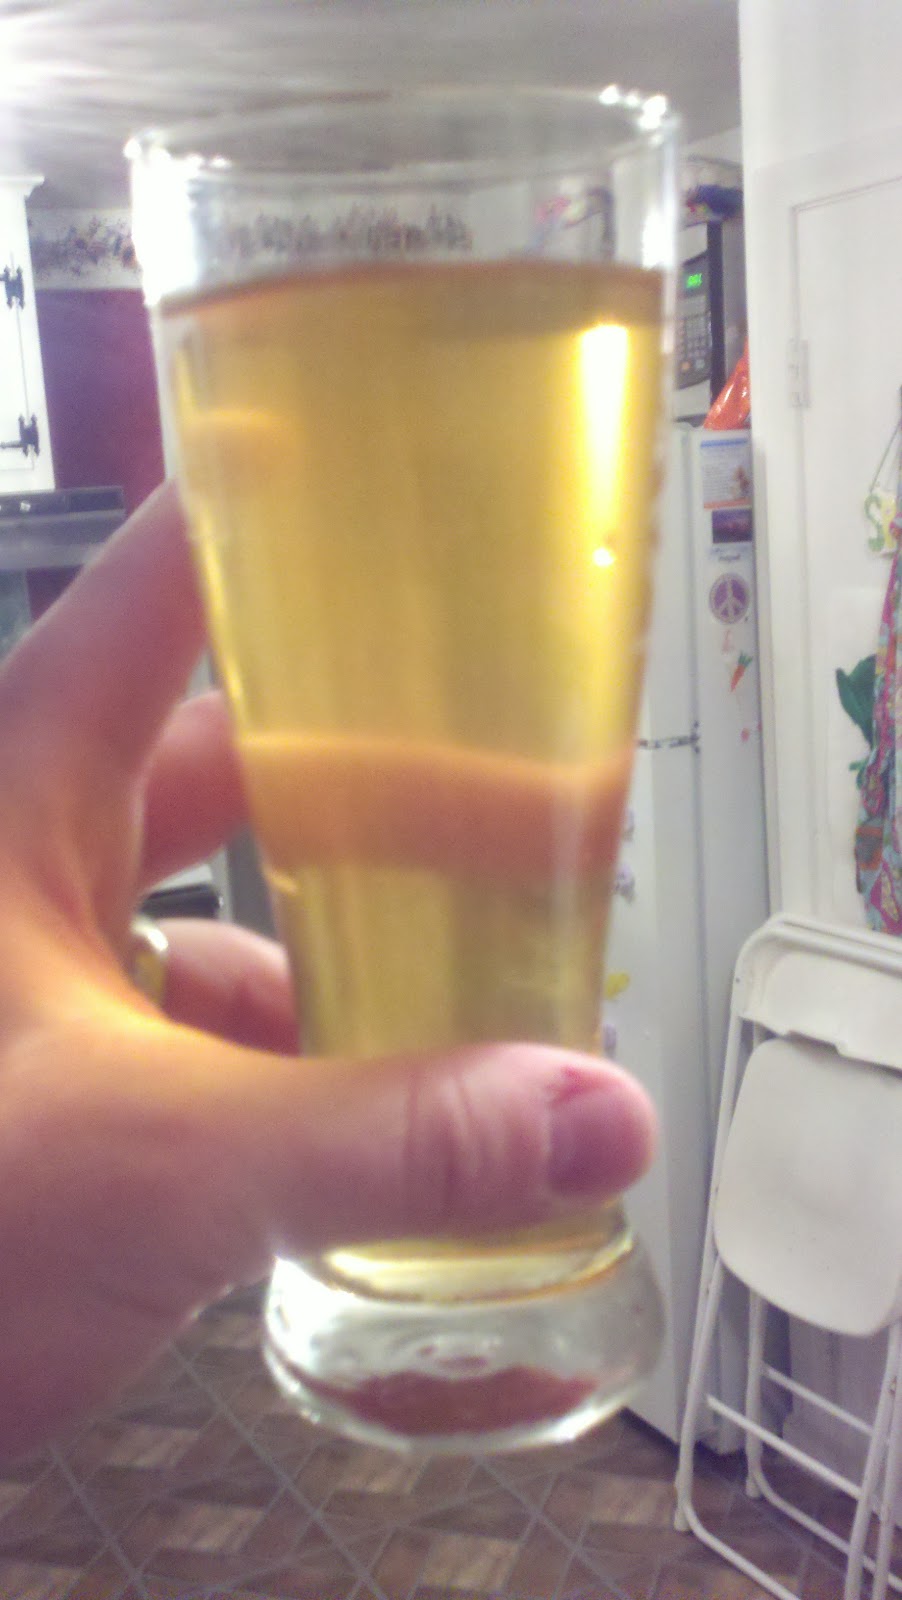
BIPA... Gone. (sadface) Will definitely brew again. This is one of my favorite brews so far. Went so fast due to pure awesomeness. So... I had to clean the keg and tap tonight. Also since my taps are dry tonight, I am drinking Sam Adams Latitude 48. I used to be a huge SA fan when I started getting into craft beers. Idk if my tastes have changed, or if SA has changed things... (probs the former) but I have not been impressed with anything SA, except for this IPA... love it! Maybs I am turning into a beer snob...

Cider... I tested to see where I was with the fermentation. As I said last time, I am trying to stop it before it ferments all the way. I didn't take an OG (Original Gravity) reading. But,g uessing I started between 1.070 and 1.080.. Tonight I tested and it was 1.034. Not quite there yet, trying to stop at 1.010 I'll give it a few more days and test again. If it's where I want it, I'll keg, chill, and carbonate.
SMaSHed Pils... Kegged! Holy C. R. this smells amazing... I dryhopped 10 days ago with 2 ounces of Aurora hops. Took a sample just because. Tested at 1.010 as expected, had confirmed fermentation was complete before dryhopping. Sample was crystal clear, I decided to take a whole glass to chill and sample.
I am not overly excited by the clarity, because I know that as soon as I chill it, it will haze up. Half hour in freezer:

This is chill haze. As I understand it, the proteins from the grains that are floating around, invisible at room temp, coagulate (?) at chilled temps and become visible causing the haziness. In my experience, if it sits at serving temps for a few weeks this will eventually settle out and clear again. This doesn't happen in commercial beers because most commercial breweries filter their beers.
So... SMaSHed Pils smells and tastes amazing... Compared to the IPA style it does not quite fit... compare the color to the Latitude 48. The Pils is obviously lighter in color. Bitterness is not as present in the SMaSHed Pils. The flavor profile of the hop is nice but it does not have the bite an IPA usually does. The Aurora hops do not have huge bittering strength. The flavor profile is dominated by the hops. Lots of citrus. I had said I thought maybe I tasted apricot, but after hearing the LHBS (Local Home Brew Store) guy describe it as tangerine, that's totally what it is. I'm really excited about this beer. so I am force carbing to hurry it up.
Sidenote: Someday I hope I will remember to either take off my socks or put on shoes before cleaning and sanitizing in the kitchen... Wet. Socks. Suck.
An IRL, non-brewer friend had asked me about my kegerator. So while cleaning my taps and kegging the SMaSHed Pils, I snapped a few pics and figured I would do a quick description of how it works... I have said several times, bottling is the worst... Not trying to scare anyone away from it, but even though I loved brewing, I hated bottling (so much) The solution was kegging. So I needed to build a kegerator. Some people use a chest freezer and control the temp so it is fridge temp with a different thermostatI. More work and takes up more space but you can fit way more kegs and taps. (I have seen some on the forums with twelve different taps!) To save space, I went with a kegerator with two taps. I built this from a new, dorm sized, fridge. I got the idea and plans from the Homebrewtalk.com forums...

I got the tower, taps, CO2 tank, lines, disconnects, and regulator from my LHBS.

I started by taking the top off the fridge and digging the insulation out so I could see where the refrigeration lines were. Then I drilled a hole in the top for the beer lines to go through. I ran the lines through copper pipes to try and keep the lines cold. I did this to reduce foaming from the first pour. It works ok... I guess... could be better.


The kegs are old pepsi kegs. Basic overview of how it works... CO2 comes from tank, pressure is adjusted by regulator, gas goes into the top of the keg and pushes the beer from the bottom of the keg through a diptube and out the beer line to the tap. When the tap is opened, the beer comes out. Just like at the bar. I have two taps and can fit two kegs and the tank in the fridge. So I can have two different beers on tap at any time. So far it's been hard for me to keep up with brewing enough to keep two on tap. But once I go to ten gallon batches, it will get a lot easier...
That's it for tonight... Planning brewday with full write-up for next weekend. I think I decided on a quick Belgian Witbier. Later...
Tuesday, May 3, 2011
Bangin' Out a Quick Cider
Distracted tonight... a lot on my mind... brewing and blogging just to occupy myself. Since I have everything on hand thought I would throw together a quick hard cider. I've done 4(?) ciders now...? So easy, so cheap. Total no-brainer to keep the pipeline full. The important thing when buying the juice is that it has to be 100% juice with no preservatives. Read the ingredients. If it says "Potassium Sorbate", it won't work. Preservatives keep the yeast from growing. Obviously fresh, local cider is better, but that isn't easy to find this time of year.

So... cider is cheap. I got juice today for $2.99 a gallon. 5 gallons of juice ($15) I also used 2-ish lbs of corn sugar ($2-3) and a cup of raisins (idk a buck?) and a packet of dry ale yeast ($3) so 5 gallons of cider for around $20...
Also, cider is easy! It took me 25 minutes to put this together... including cleanup! Compared to 5 hours for an all grain batch of beer. No boiling necessary...
First step, as always is sanitation. Sanitize fermentor bucket, airlock, knife, and cutting board.

Next roughly chop a cup-ish of raisins, and put in fermentor. While not necessary, I like to add raisins to add a little body to the cider. Also, I could be wrong on this point, but I think it adds nutrient that lessens the stress on the yeast. My first cider stank up the house as it fermented, smelled like sulfer (a phenomenon known as rhino farts on the message boards) likely caused by lack of nutrients for the yeast in the apple juice.

Next pour about half of one of the gallons into the bucket. Then add the corn sugar to the remaining juice, cap, shake to dissolve, and finish pouring in. Again, corn sugar is not necessary. All I am doing with it is boosting the final alcohol content.

Add the rest of the juice. I pour from a few feet up with a lot of splashing to aerate.

I didn't bother taking a gravity reading on this... I know from previous batches it will be high. 1.070-1.080 if I let it ferment to 1.010 it will be aproximately 8-9% alcohol...

There are a lot of options for yeast. Some recipes for Apfelwein (not much to compare with commercially in the U.S.) would use a dry champagne yeast, and let it ferment all the way out. After aging, you end up with very very dry champagne-ish cider. I've made it, and I liked it, but I prefer a little residual sweetness. I'm using a clean dry ale yeast, nothing fancy. Also, as I said in a previous post covering my last cider, I'll stop fermentation early to keep some sweetness and body.

Pitching (adding) the dry yeast, is as easy as sprinkling on top.

Seal up the fermentor, I use whatever rotgut vodka happens to be in the liquor cabinet to fill the airlock. You can use water or sanitizer also, but no bad stuff will grow in the vodka. And if it something happens and it gets sucked back into the fermentor, I would rather have a shot of cheap vodka in my brew than old water or worse sanitzer... I'll throw it into the closet for a week and check the gravity. If it's where I want it to be (1.010), I'll keg it and chill to stop fermentation.
Cider can be as easy as pouring 5 gallons of juice into a sanitized bucket and adding yeast. Well... that's assuming you are kegging... I would like to cover the bottling process (total lie) for you, but I hated bottling... by far the worst part of homebrewing. I will however provide a link that covers the process with a lot of great tips on how to make it easier. Bottling article from homebrewtalk. Homebrewtalk.com is probably the biggest wealth of knowledge on the interwebs for homebrewing. Most of what I have learned has come from that site and it is always my first recommendation for anyone looking to get started brewing.
Anyways... I am full rambling now. Full avoidance mode. Guess I'll call it a night, back to work mega early for my first day back from vacation... Later.
Subscribe to:
Posts (Atom)