Some advice I picked up on the message boards from the guy who runs Austin Homebrew Supply... With a beer style that focuses on the malt profile, use the best malt. For a style that focuses on the hop profile, use the best hops. And for a style that depends on the yeast, use the best yeast.
For a Wit, yeast is key... I have shown how I use dry yeast (which is totally fine for some styles) but here, I am using a liquid yeast which requires a little more work.
The brand of liquid yeast I always use comes in a pouch called a smack pack. It has a little pouch of yeast nutrient and food inside that you break open by smacking like an ice pack. Once smacked, the yeast wake up and eat, making the pack swell up. In the pic I already smacked and left sitting out for three(?) hours.
The manufacturer (Wyeast) says that this is plenty of yeast to start a 5 gallon batch that is up to 1.060 original gravity. But, the general consensus on the interwebs is that you should always make a starter with liquid yeast. I threw a starter together last night while cooking dinner. total multitasker ;)...
What's a starter?? Basically a yeast culture to increase the cell count and prove that the yeast is alive and well. The more yeast I use to start the beer Saturday, the less stressed the yeast will be and the quicker it will take off. So... pretty easy, all I do is make a super small (2 cups) batch of beer using dry malt extract, aerate, add liquid yeast, and keep aerated. When it is all feremented, the yeast will settle at the bottom.
This is dry malt extract (I know what it looks like) 3/4 cups extract and 2 cups water
Bring to a boil, watch closely... it can boilover easy!
Boil for 10 minutes (ish) just need to kill off any bad guys hanging out... Then cool it off. I fill the sink with cold water, put the pot in and swirl around till cool. Be careful not to splash gross sink water into wort.
After sanitizing my super cool frosted Magic Hat growler (bought at the brewery in Burlington, VT... full of amazing Encore IPA, way too cool for school...), I pour the cooled wort in.
Swirl around a bunch to aerate, yeast need oxygen to multiply.
Open yeast pouch and pour in liquid yeasties... then swirl again...
When making beer, the goal is to keep anything from getting in the fermentor. Here I want to keep adding oxygen to keep the yeast multiplying, so it has to be able to breathe. To seal, instead of using an airlock, I loosely cover in sanitized tinfoil
I keep it aerated by swirling the growler every time I think of it, or whenever I walk by it... As a future project, I am going to build a stirplate, this will constantly mix and aerate the starter with a super cool tornado vortex of beerness...
24 hours later, yeast have multiplied like crazy and it is starting to settle. See the light band on the bottom of the growler? That is solid yeast, also the milky looking beer has a lot of yeast still in suspension. When I brew Saturday, I can either pour out the clear beer sitting on top, or just swirl the whole thing up and pour in.
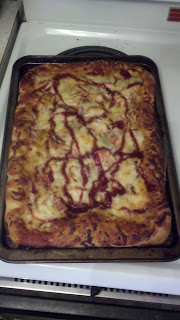
Also this. BBQ chicken pizza I made for dinner while doing the starter... grilled chicken, bbq sauce, red onions and gorgonzola cheese... zomg
So... brewday Saturday... maybs blog sat night, maybs Sunday. Tonight I'm tasting the SA Lat 48 Deconstructed 12pack. Hopefully plan on posting my garbage tasting notes too. Later...


I absolutely love reading these. I'm going to get you more followers.
ReplyDeleteThanks Tim! I'm glad you dig it!
ReplyDelete